")


When we first moved into our home in 2008, this little bathroom was the first space we tackled. It was literally the very beginning of The Ginger Home. It was the first renovation that Mark and I took on together, with absolutely no idea what we were doing! Now almost 13 years later it was in need of some TLC. We gave it a makeover with an English Country flair. Here are all the details and maybe you’ll find some ideas for your own small bathroom refresh!
Estimated reading time: 10 minutes
Note: This post may contain affiliate links that won’t change your price but may share some commission.
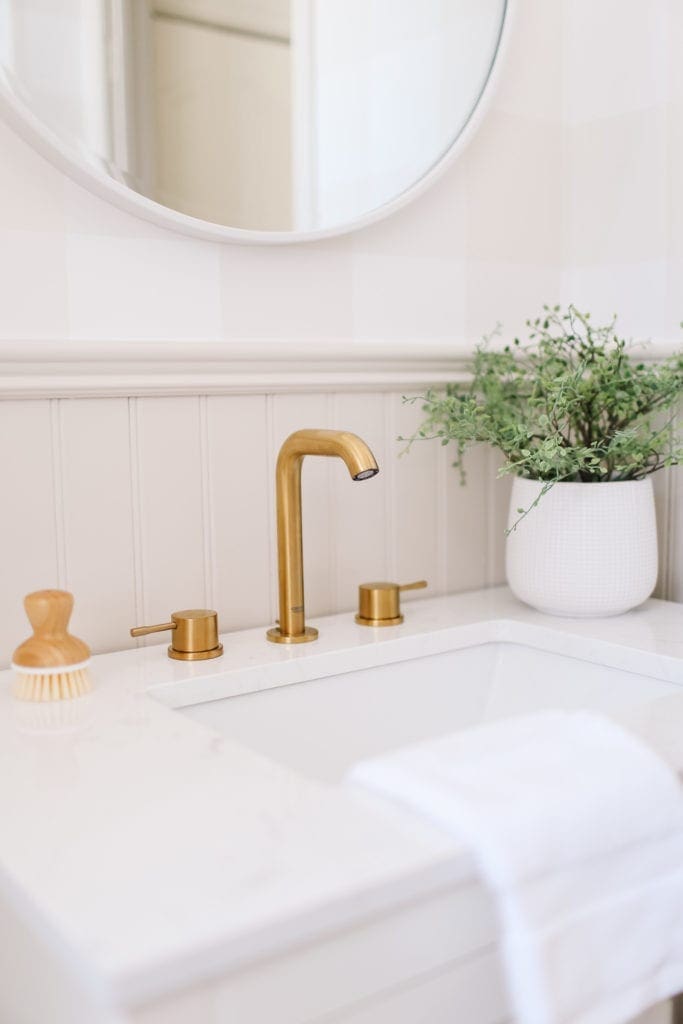
Table of Contents
EVERY BATHROOM HAS A STORY
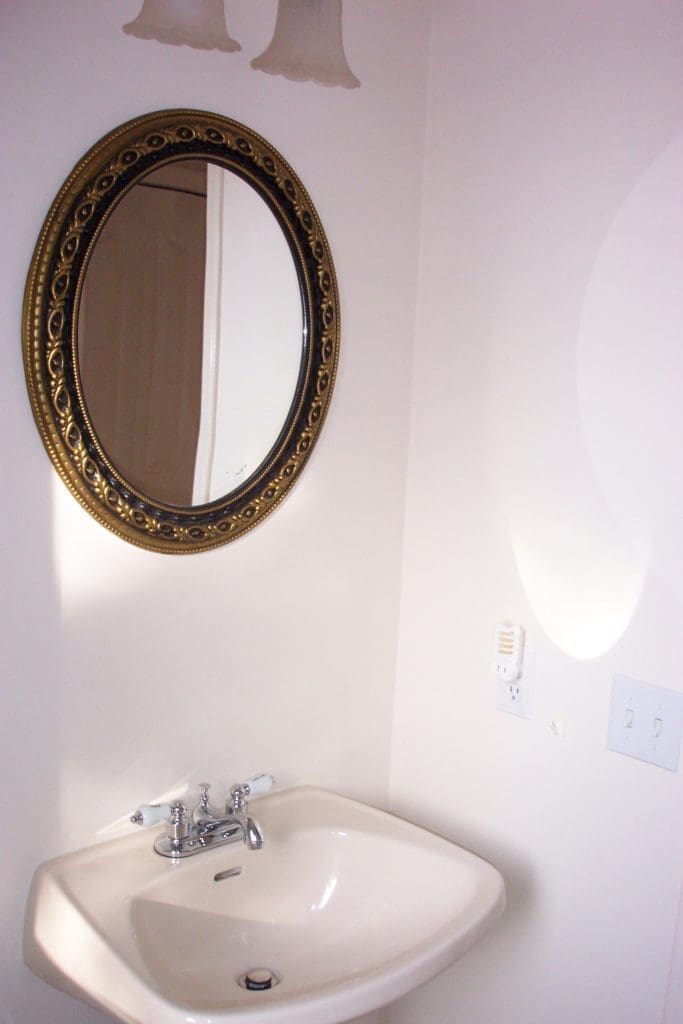
When we bought this house it hadn’t been updated since the 1990s when it was built. There was pink carpet galore and the bathroom was a bit…ahem…lacking in character.
Here she is in all her glory. This is actually the only picture I have of the original space, but you get the idea. And yes that mirror on the wall is plastic and Mark told the previous owners they could leave it there lol!! I feel like the evil queen from Snow White is going to jump out of it.
We felt like this bathroom would be one of the easiest rooms to start our renovation since it was small and would be “simple”. Ah to be that sweet and innocent again!! Anyway, we tested our marriage in the fires of plumbing hell and ended up with a decent, if boring, space that served us well for a decade!
Fast forward 12 years and we now have 2 kids that used this space boisterously and a room that’s looking at slightly run down. So we decided to give it a makeover!
PLANNING THE BATHROOM REFRESH
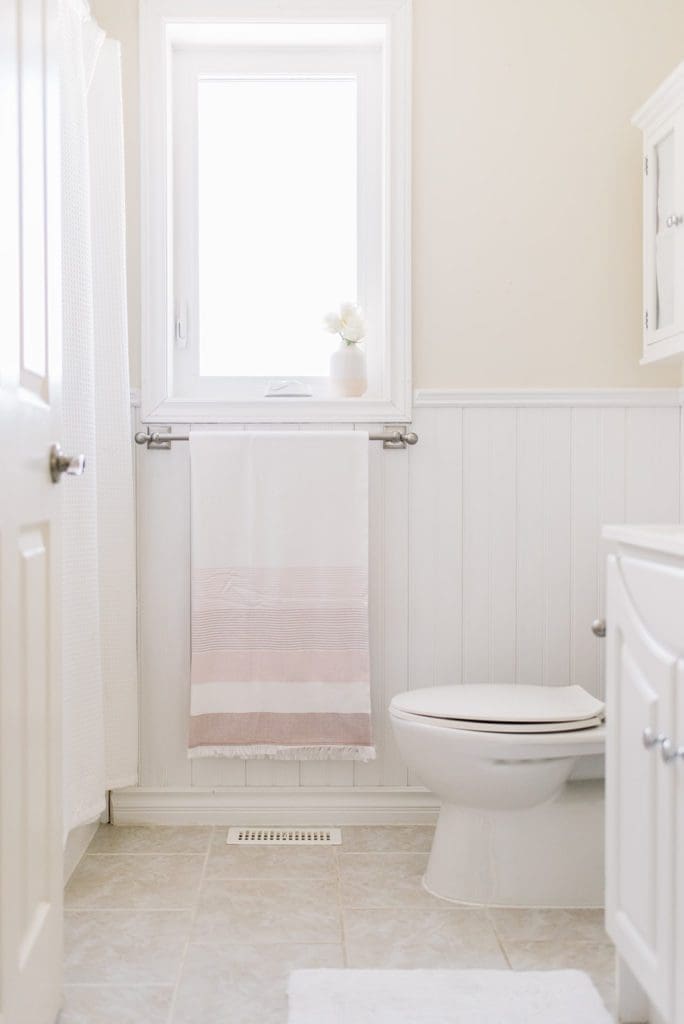
It wasn’t in the budget to totally gut the space so we decided to leave the tub area untouched. We had it painted when we first moved in as it was a rather awful almond colour. That was supposed to be a temporary fix, but it’s now been well over 10 years it’s peeling quite badly. It needs to be pulled out and replaced but for now, we just hide it. An extra long shower curtain from Amazon hangs just a couple of inches below the ceiling, completely hiding the tub, tile etc….
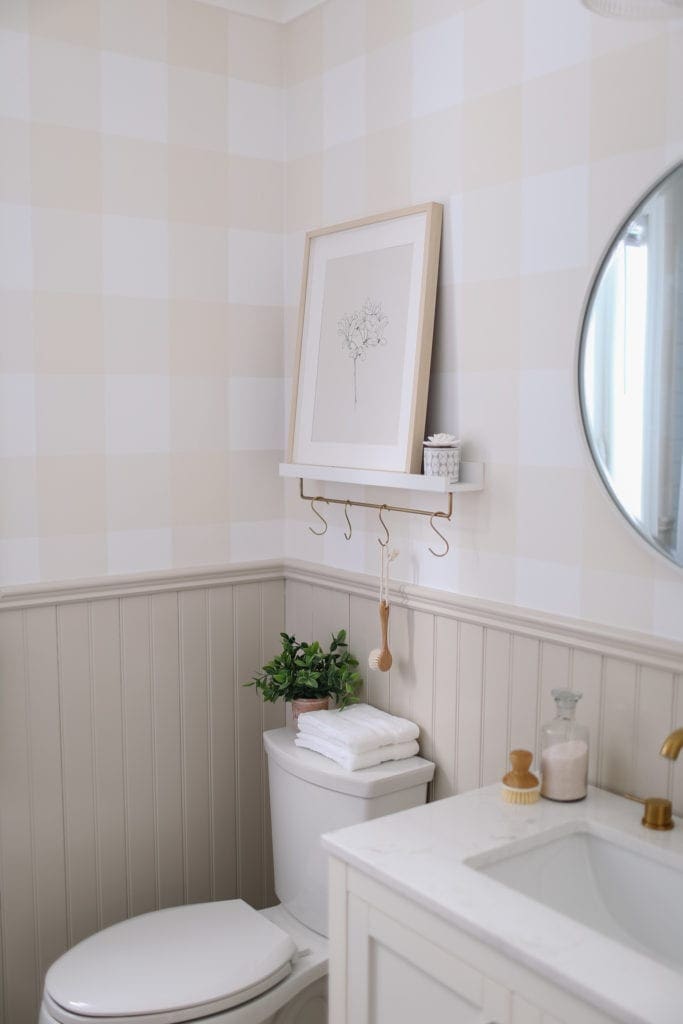
We also decided to work with the existing tile and wainscotting to keep our cost and timeline under control! Painting the wainscotting in Benjamin Moore Edgecomb Gray gave it an updated look. And giving the grout and tile a thorough cleaning made a surprisingly noticeable difference.
By saving on some of the basic elements in the room, we were able to splurge a little more on some of the other items we put in the space.
The Most Beautiful Brass Faucet
Did I design this entire bathroom makeover around a faucet? Yes, yes I did. The heart wants what it wants. This beauty faucet is the new Essence Widespread Faucet in Brushed Cool Sunrise finish from Grohe Canada.
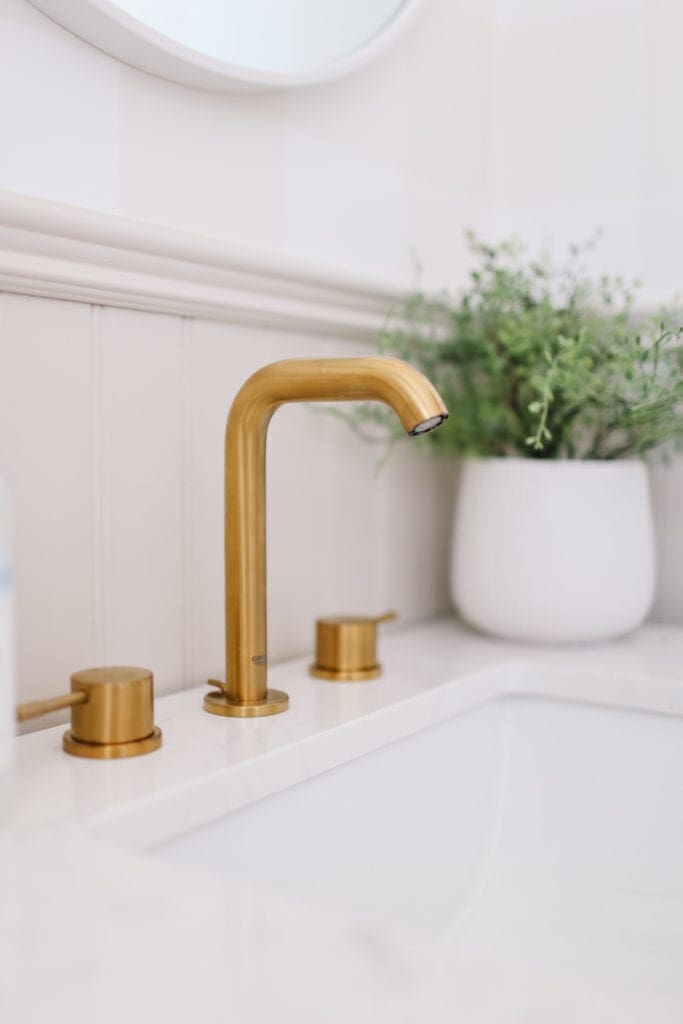
She’s beautiful, she’s sleek, and I’m slightly sad that she’s not in the master bathroom lol! We loved working with Grohe on this project as they have a climate care & sustainability initiative in place that is truly admirable! And they produce beautiful, but also durable products. I have no doubt this faucet will last the test of time (and two kids under ten)!
A Classic Vanity
Next up on the list for this small bathroom refresh was finding the perfect vanity and I looked for the following things:
- A square sink – I really wanted a clean, modern look to contrast with the warm, old-world look of the brass faucet.
- An 8″ spread on pre-drilled faucet holes – When you are looking for a vanity and faucet don’t forget to check how the faucet mounts and make sure your vanity accommodates that. (I may have learned this lesson the hard way in the past!)
- An open feel – Because it’s a small space I wanted the vanity to feel airy while still providing a good amount of storage.
- A marble top- I really love the look of marble counters and brass fixtures! So classic!
We settled on the Caoimhe 30″ Single Vanity Set from Wayfair. It comes fully assembled in one piece (sink and vanity included). And it’s quite nice and sturdy in person. For the price, it was a definite win!
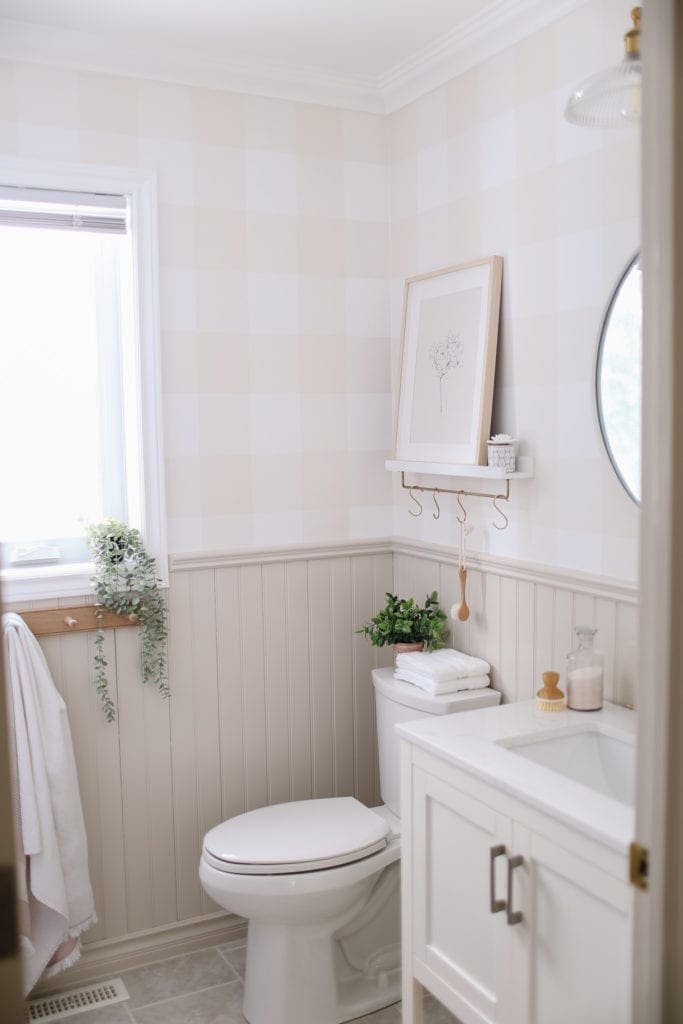
The vanity even came with the handles already installed. They are currently a chrome finish and I keep forgetting to spray paint them. But at some point in the near future when I am feeling motivated I will!
Plaid Wallpaper
I knew I wanted a slightly English Country feel in the bathroom to keep it consistent with the rest of the house and when I saw this Tan Gingham Peel & Stick Wallpaper from one of my fav Canadian companies, Rocky Mountain Decals, I knew it would add the perfect English Country touch!
I love that it just adds a subtle pattern to the walls. And it was actually pretty easy to install. You can see the whole process on Instagram. Just find the “BATH 1” & “BATH 2” story highlights!
Mirror Mirror on the Wall
I was intending on putting a trendy arched mirror into this space, but when I saw this pretty round mirror with a white metal edge it was too perfect to pass up! I love how the curve contrasts against the lines of the plaid wallpaper behind it and ties in with the vintage look light.
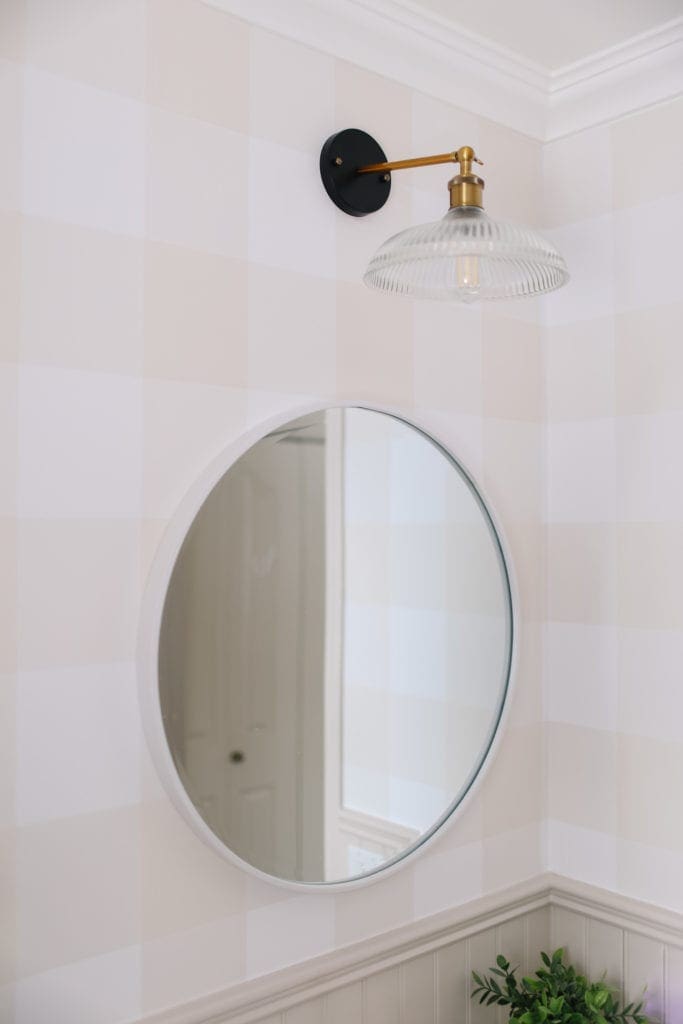
Vintage Fluted Glass Light
The light I chose was an inexpensive find from Amazon and unfortunately, it’s the one thing we put in the space that doesn’t get rave reviews. It’s soooo cheap in person and I was pretty disappointed when I opened the box. It actually didn’t even come with a grounding wire and the metal neck barely holds the shade up. At some point, we are going to replace it. I’m afraid it’s going to break and hit the kids while they are brushing their teeth!!
So as cute as it looks, I can’t recommend it.
Pretty Bathroom Accessories
Once the basics were in place it was time for the fun part! Accessories!!
SHELF DIY
I really wanted a cute little shelf to put a piece of art and maybe a few little bathroom pretties or a diffuser on and I had a vision in my head of what I wanted, but I just couldn’t find it. So I decided to make it myself!
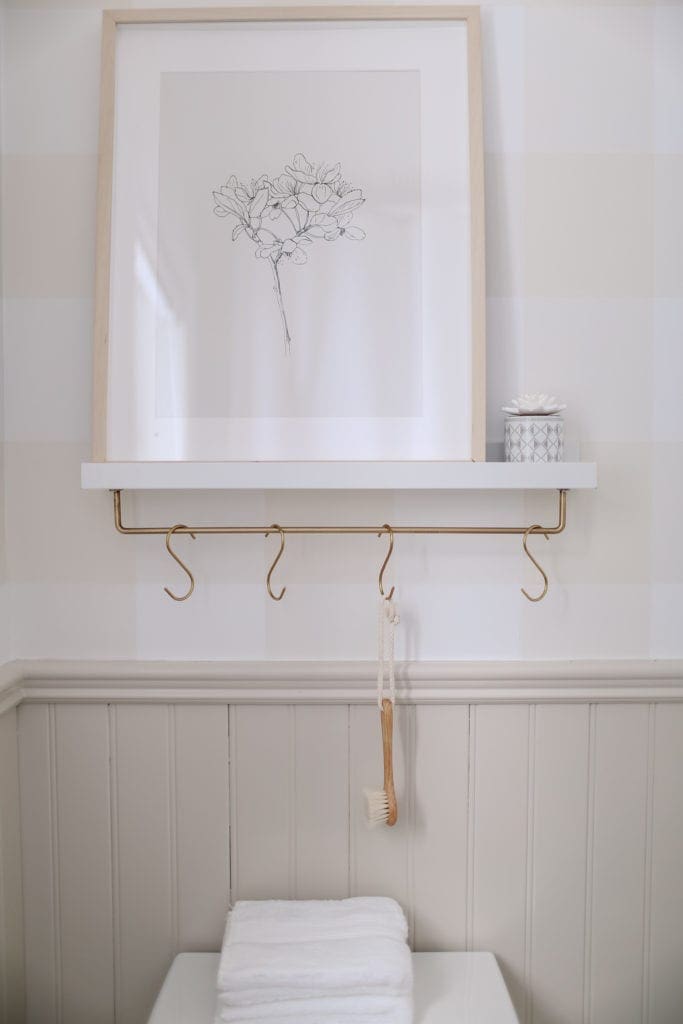
I found a 24″ Ikea picture rail that I had in storage and added this little brass rod and S hooks from June Home Supply, a favourite small Canadian shop! Again, you can see the whole process in my Instagram stories.
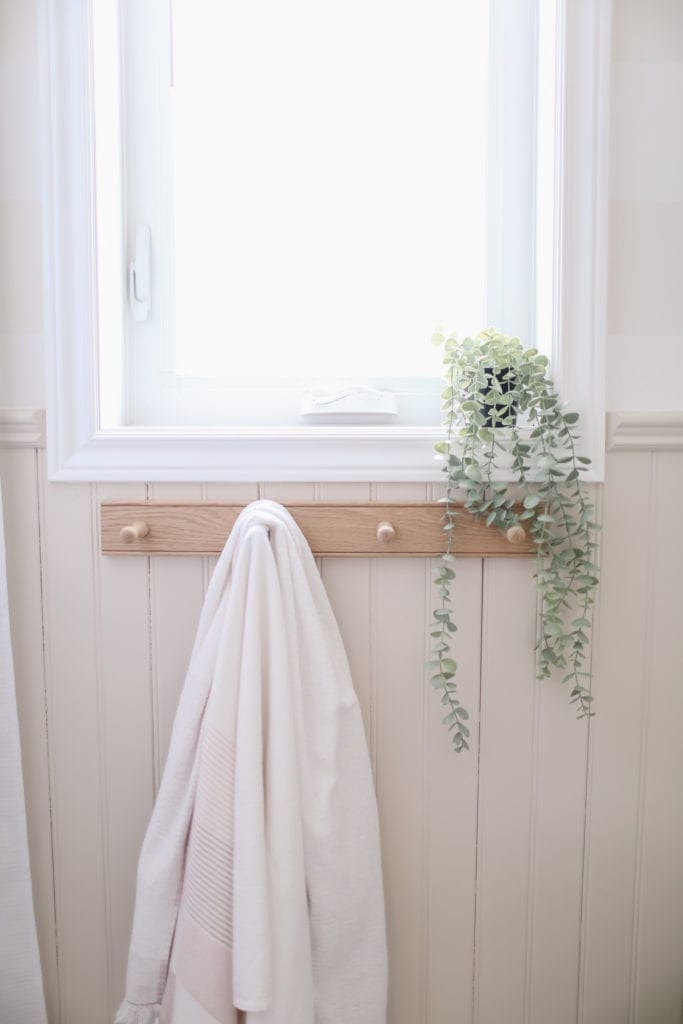
PEG RAIL
I have to admit I have a small obsession with peg rail right now. I was so excited when I found this oak shaker peg rail (made in England) that was the perfect length to fit under the window. The wood grain looks so pretty against the soft greige color of the wainscotting.
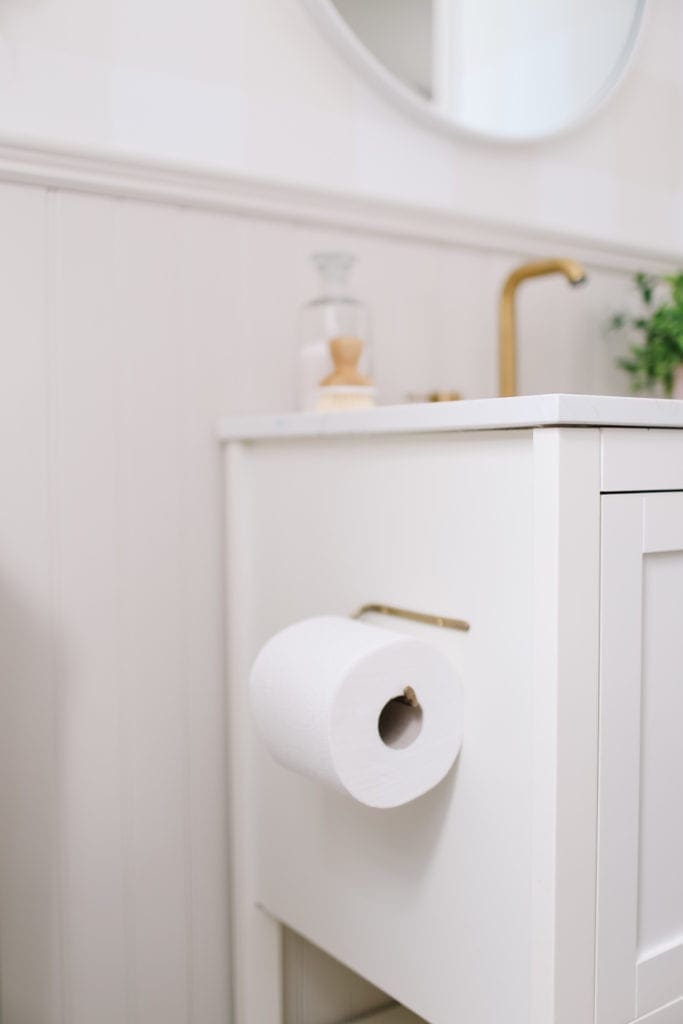
BRASS ACCESSORIES
I wanted to add a few more touches of brass to the space to tie in with the beautiful faucet. This little brass toilet paper holder was another find from June Home Supply (See, I told you they are my favourite!)
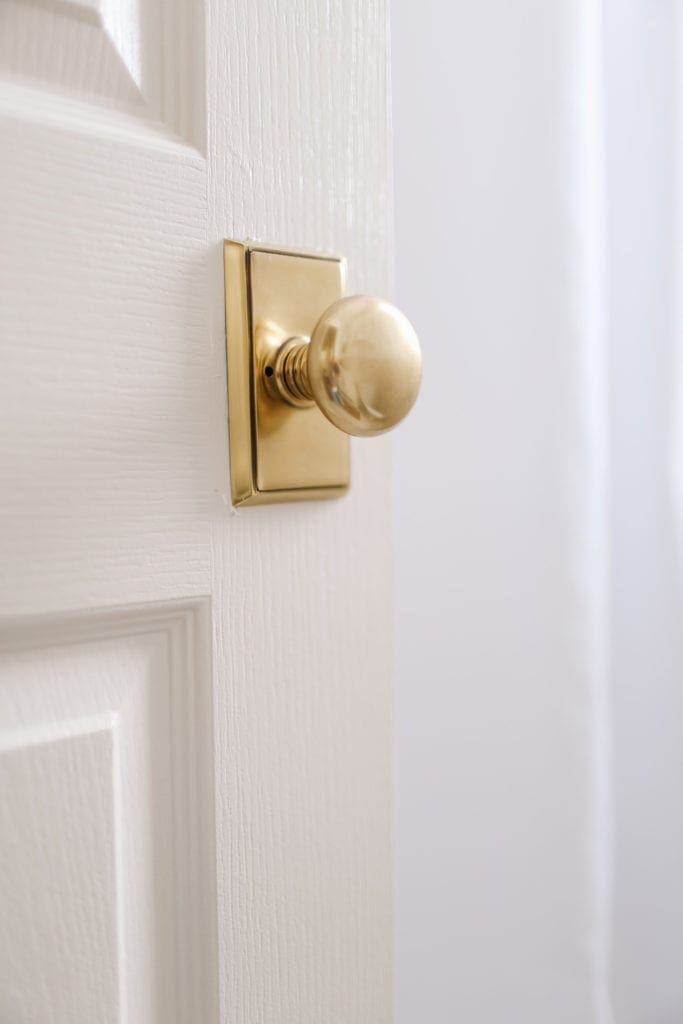
I also wanted to add a statement doorknob to the space, because you can see the bathroom from pretty much every area of the main floor of our house. I’m not sure why it was designed that way, but hey, you work with what you’ve got right? This gorgeous Providence Knob in French Antique Brass finish by Emtek had just the European flair I was after!
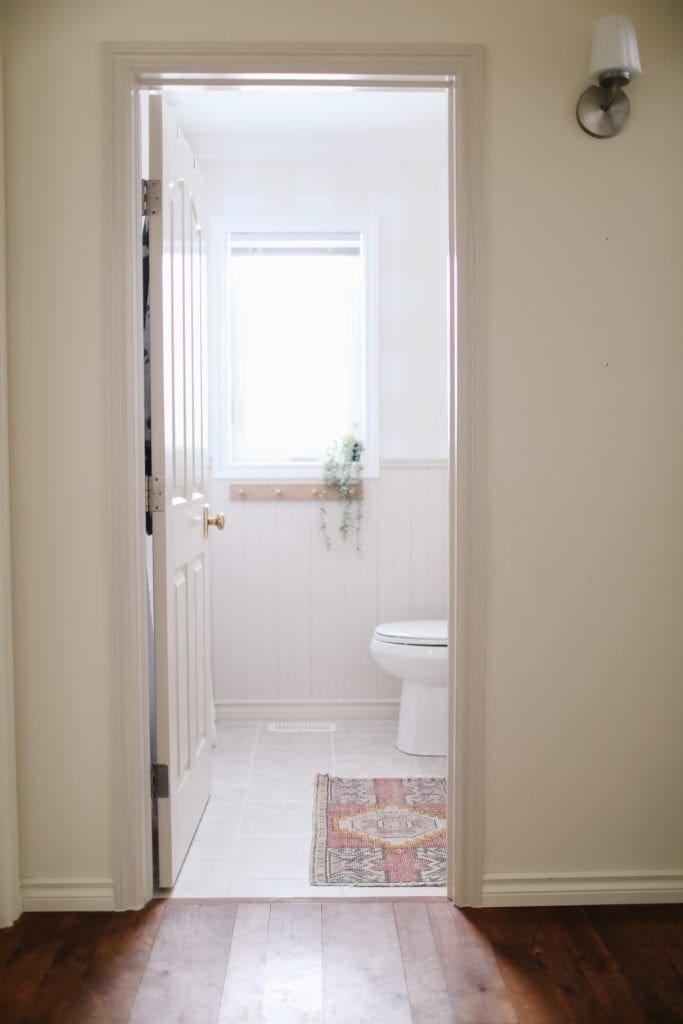
Now this view at the end of the hall makes me happy every time I walk by, even though I’m staring directly at a toilet!!!
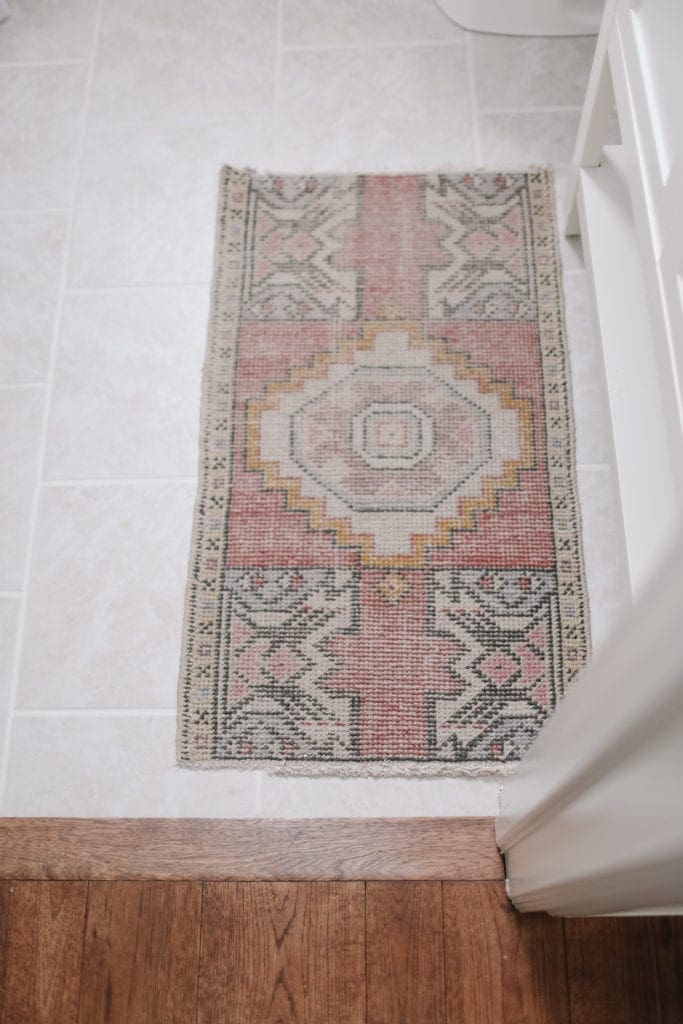
VINTAGE RUG
I already had this beautiful little pink vintage rug and it’s like it was made for this space! I love the pop of colour and pattern it adds to the otherwise very neutral space. My favourite source for vintage rugs is Etsy. You can find some real gems!
THE MORAL OF THIS BATHROOM STORY
I hope you’ve enjoyed this rundown of our English country style small bathroom refresh! This was the first renovation project that I have taken on almost entirely by myself and I documented the whole process in detail. So if you want to see how I changed the vanity faucet and toilet, installed the light, cleaned the grout, or any of the other tasks I took on you can see it all go down on Instagram. Look for my story highlights “BATH 1 & BATH 2”.
I hope this small bathroom refresh inspires you to try something new in your home too! You can do it!!
MORE PROJECTS YOU MIGHT ENJOY:

I am in love with your bathroom..it is so simple and elegant. Where did you find the faucet. When I searched the website it was unavailable for delivery.
I love the bathroom faucet….did you patina it yourself.
It looks more aged than the website photo?
No that’s its factory finish! It looks beautiful 🙂