")


When we first moved into our 1990s bungalow in 2008 we had big dreams for it. 10 years later we finally made some of those dreams come true and the space I’m most grateful for is our sunroom addition. We call it our screen room or 3 season room, but whatever you want to call it we absolutely love it. I get asked about it a lot, so I’ve finally compiled all the details here. You can see how we built it and I’ve also shared what we love and what we would change if we ever built one again!

Estimated reading time: 13 minutes
Note: This post may contain affiliate links that won’t change your price but may share some commission.
Table of Contents
Sunroom Addition Plan
Our small house has undergone so many changes over the past decade.
If you would like to see the full transformation check out:
When we bought the house there was only one main entryway and it opened directly into the living room. Adding a mudroom was our number one priority, especially as kids and dogs came along!
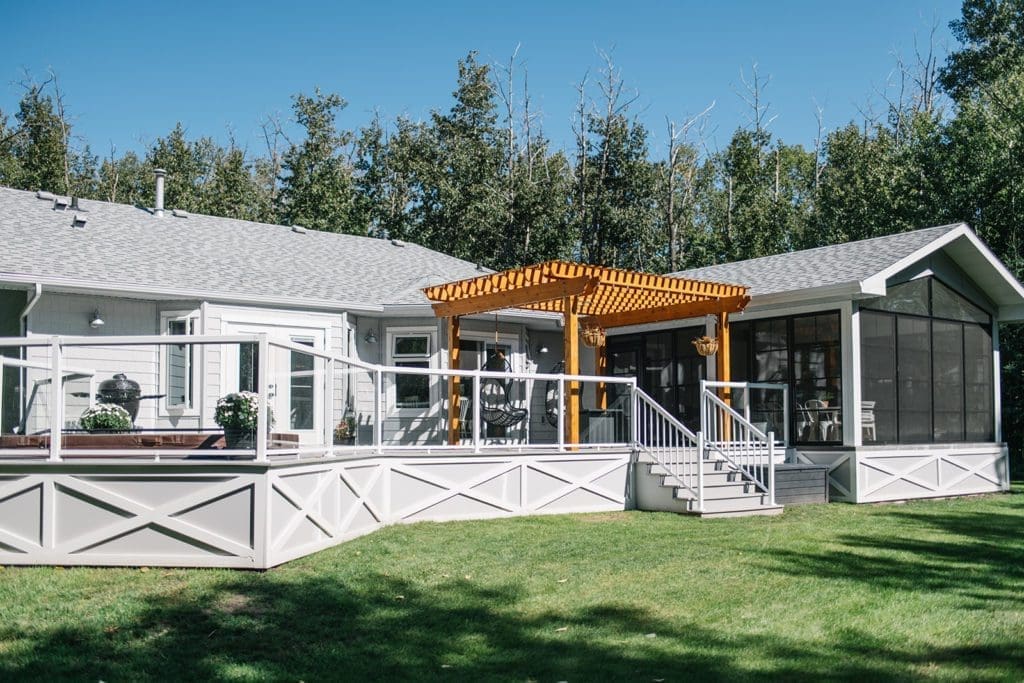
When we started to think about where we could add that space, there was really only one option that worked. Adding a small mudroom beside the kitchen door (on the right-hand side of the house in the photo below) was our best bet. We wouldn’t have to change the structure of the existing house.
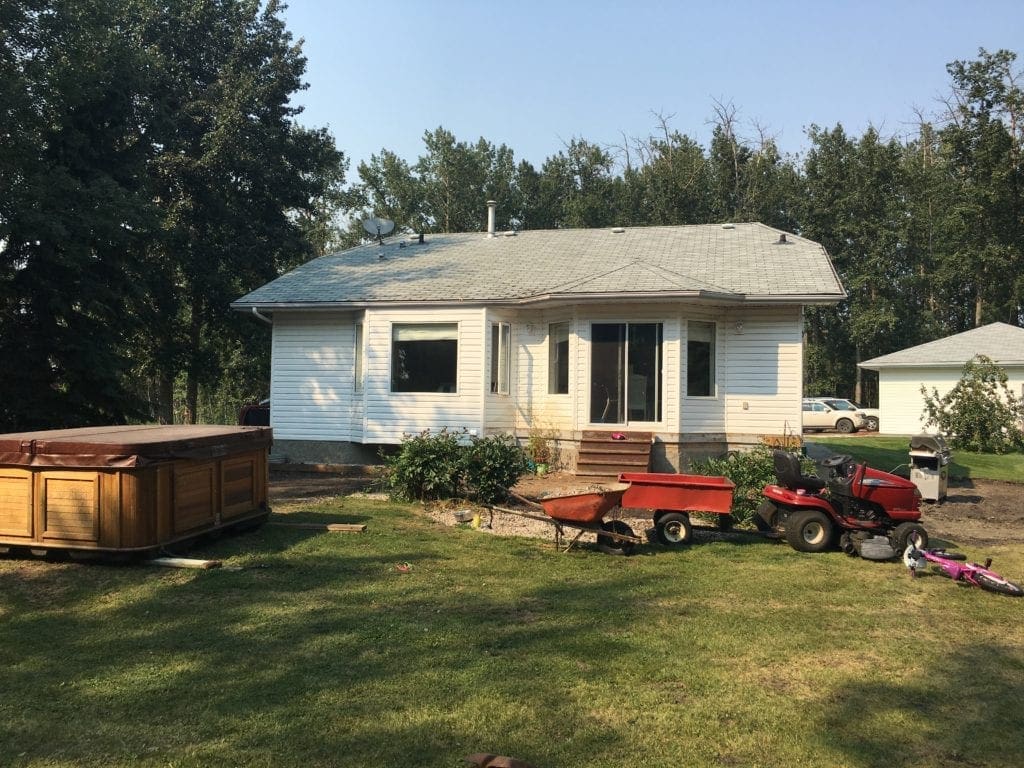
I can’t believe how small the original house looks here!! As you can see our original plans morphed into a much larger renovation. We decided to add a screen room onto the back of the mudroom addition.
We thought about it for a long time and weighed all the pros and cons. Finally, we decided that if we were going to have to remove the deck, some of the siding etc… as well as redo the windows and roof, it made sense to do everything at once instead of in stages as we had originally planned. So beware the renovation snowball effect lol! It’s no joke.
Sunroom Exterior Finishes
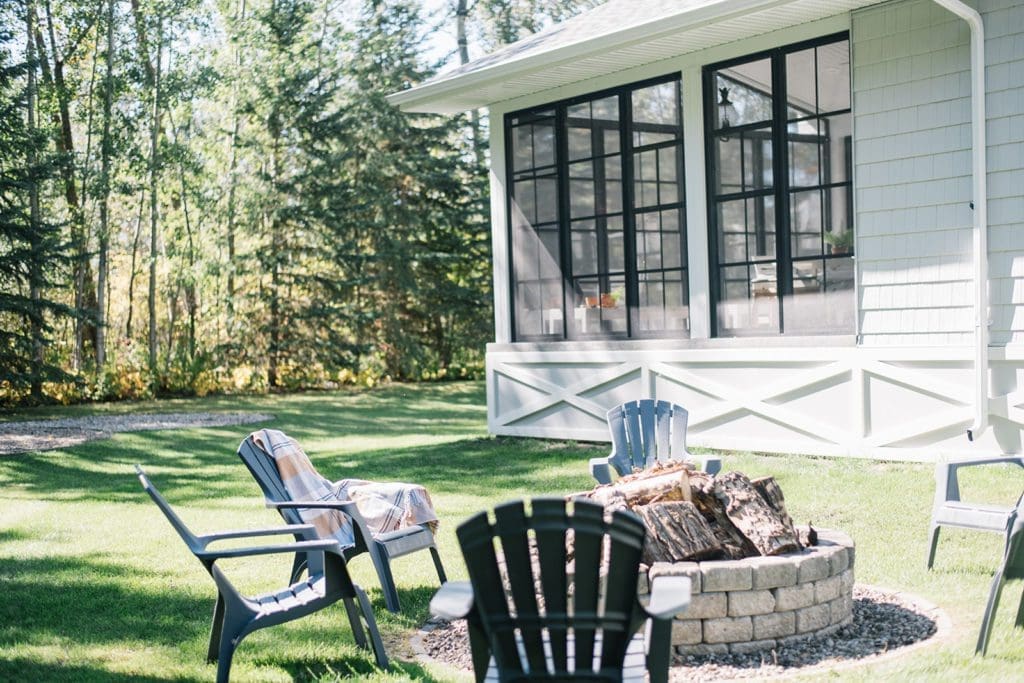
Our house sits on 4 acres of land outside Beaumont, AB. We have quite a few trees, a little pond, and lots of nature surrounding us. When I thought about what style I wanted for our renovation, farmhouse just felt right for the location. I love modern farmhouses, old farmhouses, English farmhouses and everything in between, but I didn’t want the house to feel dated. So I created my own eclectic style that I like to call modern English country cottage farmhouse! It’s a thing, or at least it is in my head lol!
Structure
Our climate can be fairly extreme here in Alberta. We frequently range from -40ºC in the winter to +40ºC in the summer. Winter can last for up to 7-8 months. I wanted a structure that would withstand the elements and that would allow us to use the space for as much of the year as possible. We decided to add a permanent foundation and permanent roof structure in order to do this.
Building Process
We chose an ICF block foundation with gravel fill and a concrete slab poured on top.
We considered just extending the deck and building the sunroom on top, but we wanted to maximize the seasonal use. Building a solid foundation would allow us to keep the space warmer and keep out bugs and dirt.
We were building the foundation for the mudroom anyway, so we simply extended it.

Us Laying out the foundation! 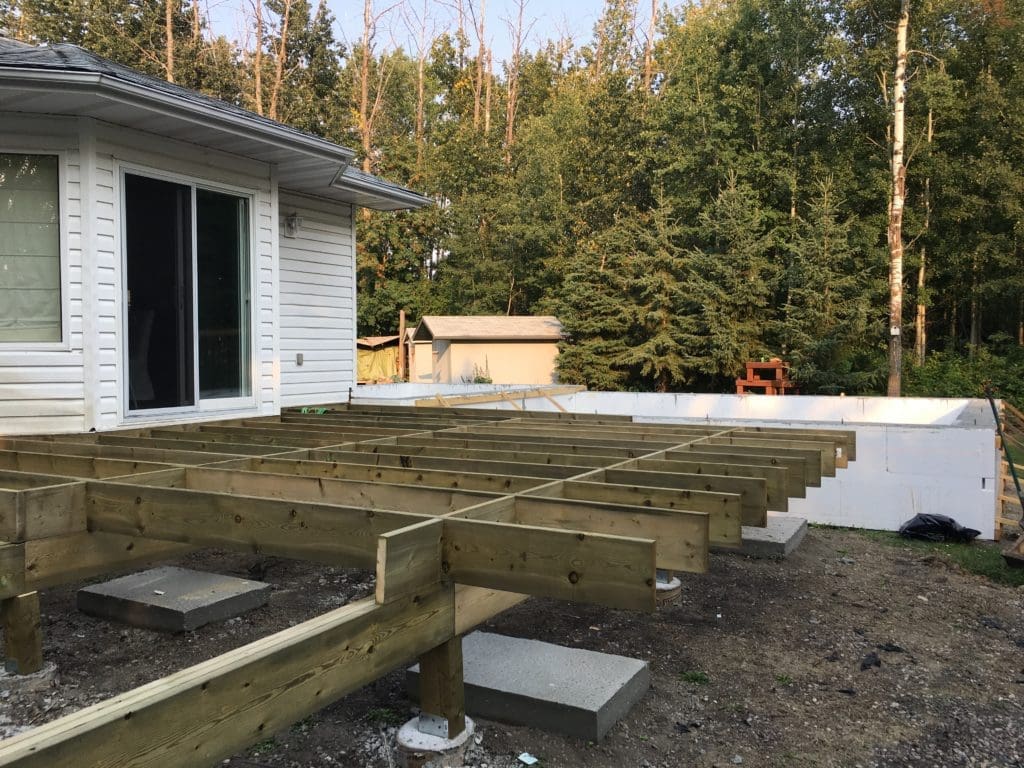
Building the deck structure! 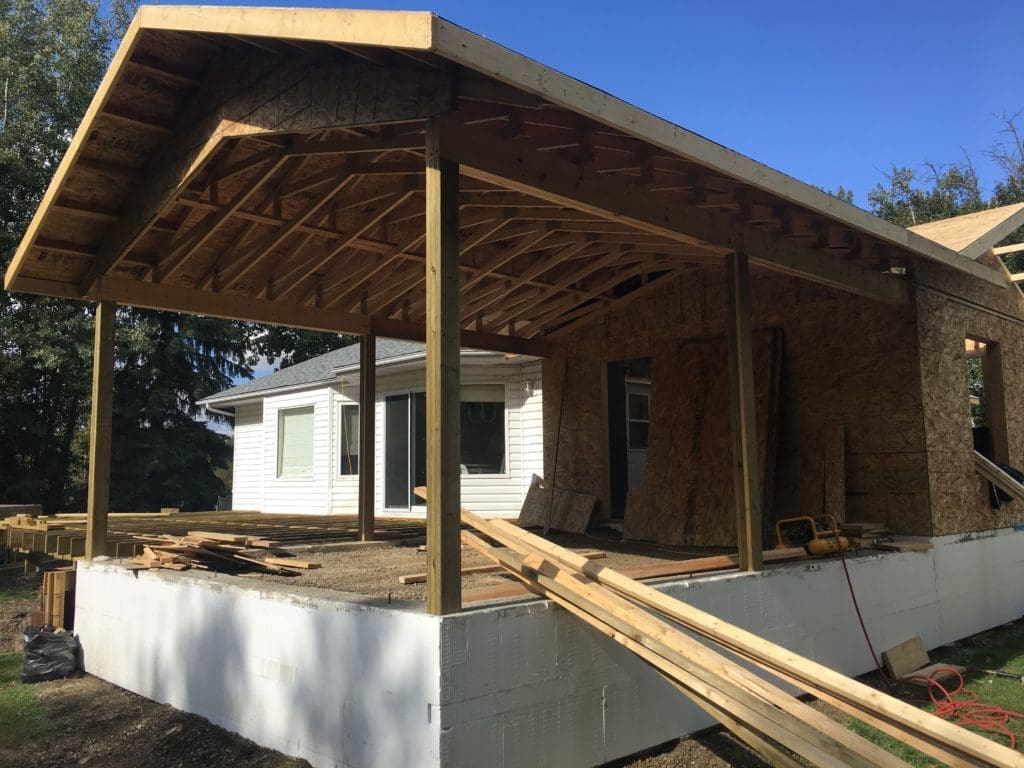
Building the new roof! 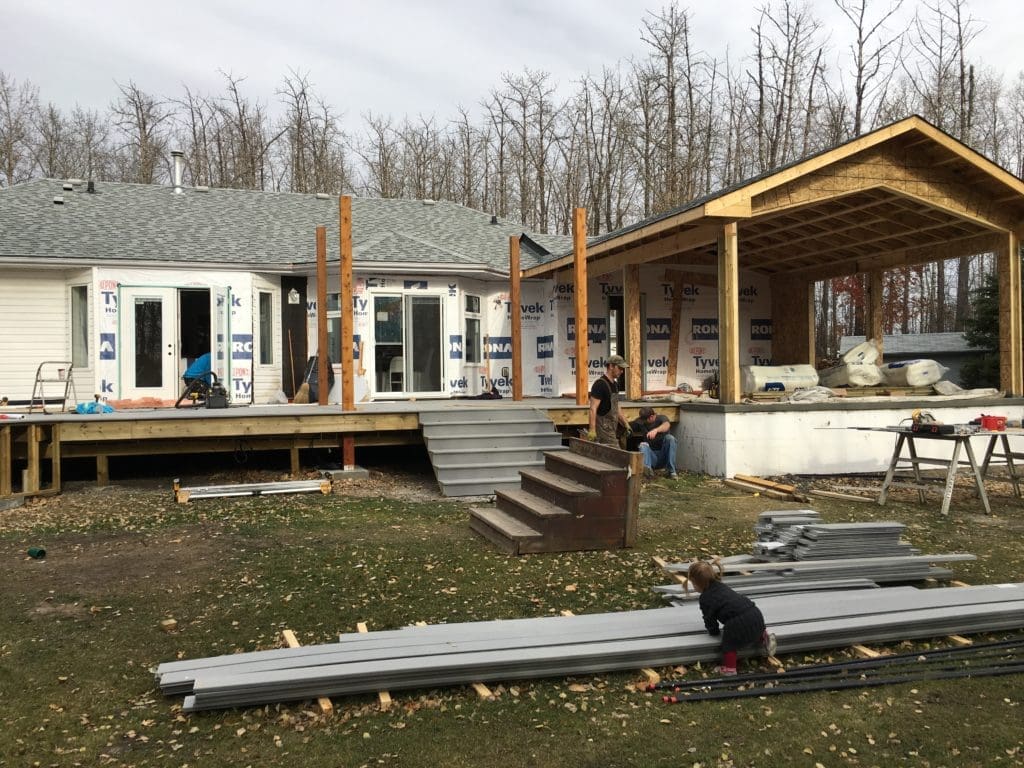
Starting to take shape! 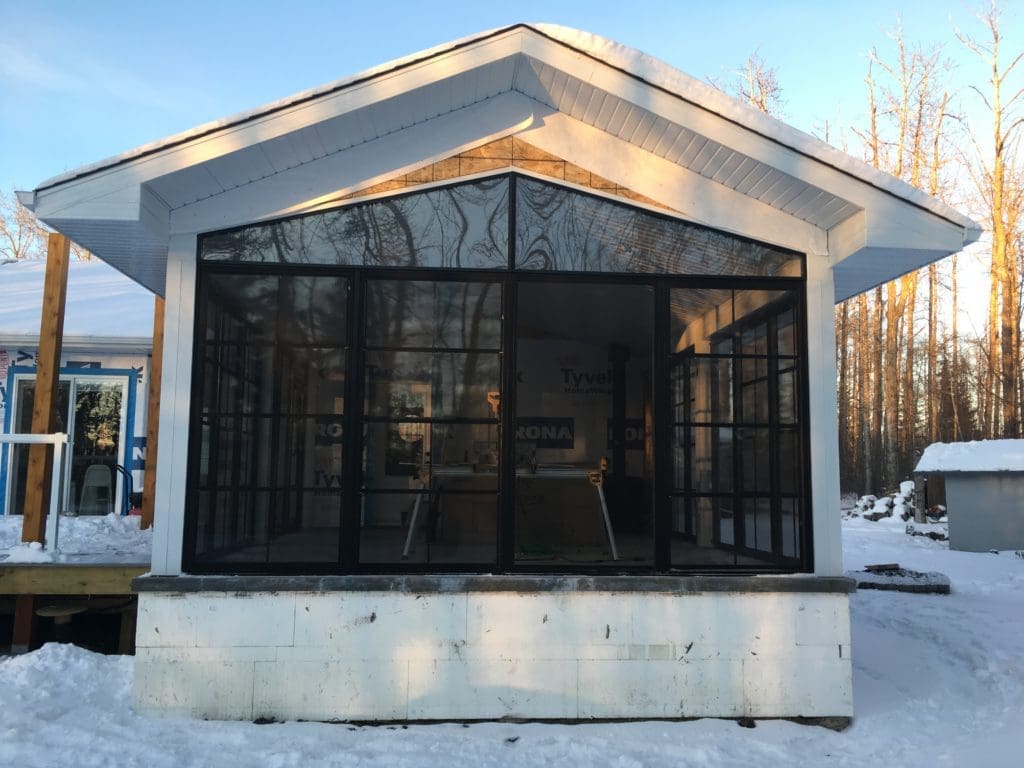
Screens being installed! 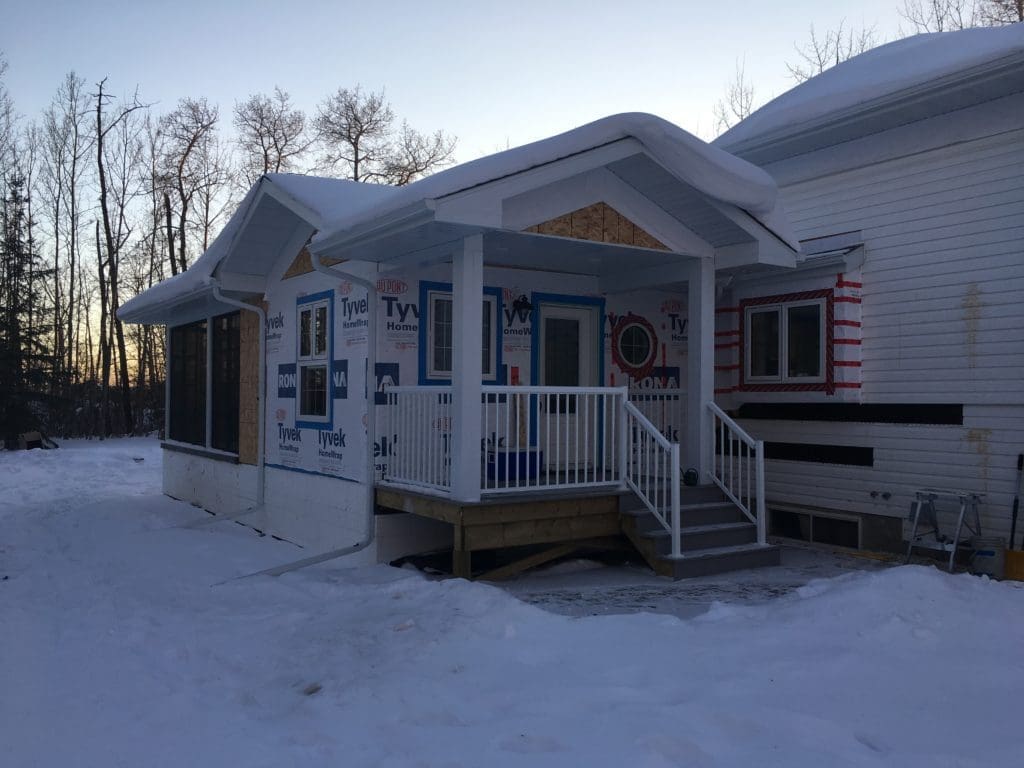
View of the mudroom addition on the front! 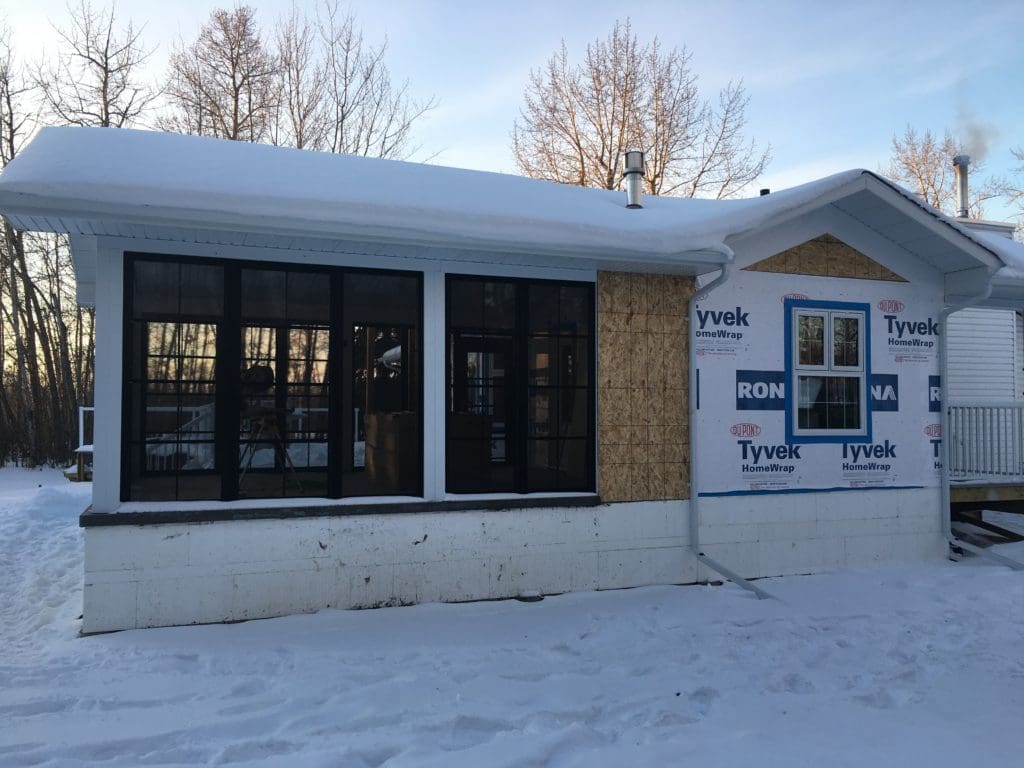
View of the mudroom addition from the side! 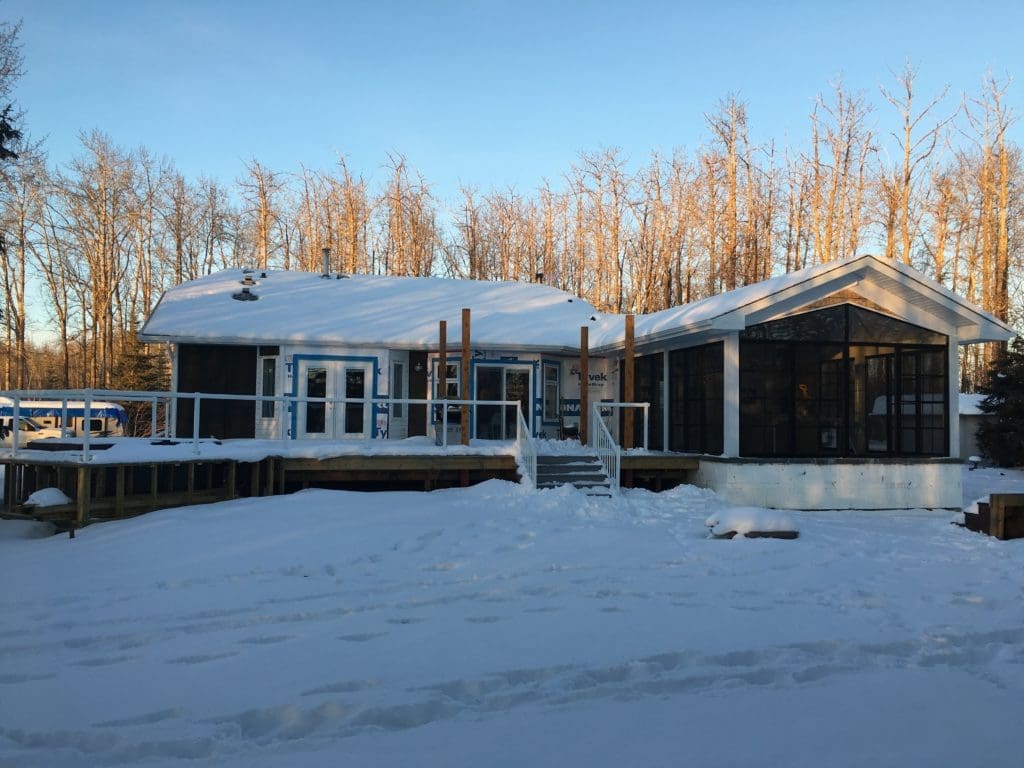
Structure starting to take shape!
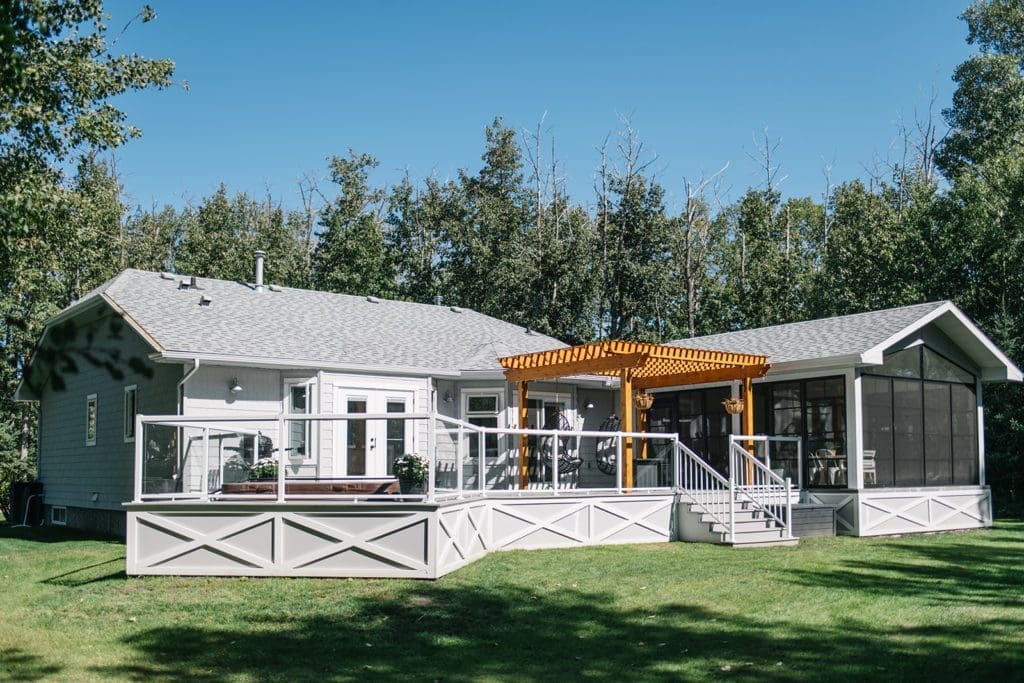
We chose to use the same finishes on the exterior of the sunroom as we used on the rest of the house: Allura Fiber Cement Siding in Sterling Grey and Allura Fiber Cement Trim in Snow White. We covered the ICF block foundation with cement board and then created the X detail using the trim. I love the unique look it creates!
Hire Help or DIY?
We’ve been asked a lot about whether or not we hired out for this project. Long story short yes we did, and it didn’t end well. So unfortunately I don’t have a contractor recommendation for locals who are wondering!
After watching the process, Mark feels confident that he could do a lot of it himself next time. We would definitely choose to be our own general contractors from now on. If you do need to hire out, do your research before you start. Ask for references and sign a detailed contract so that both parties know exactly what to expect from each other.
Dimensions
We actually doubled the size of the space at the last minute and we are so happy we did.
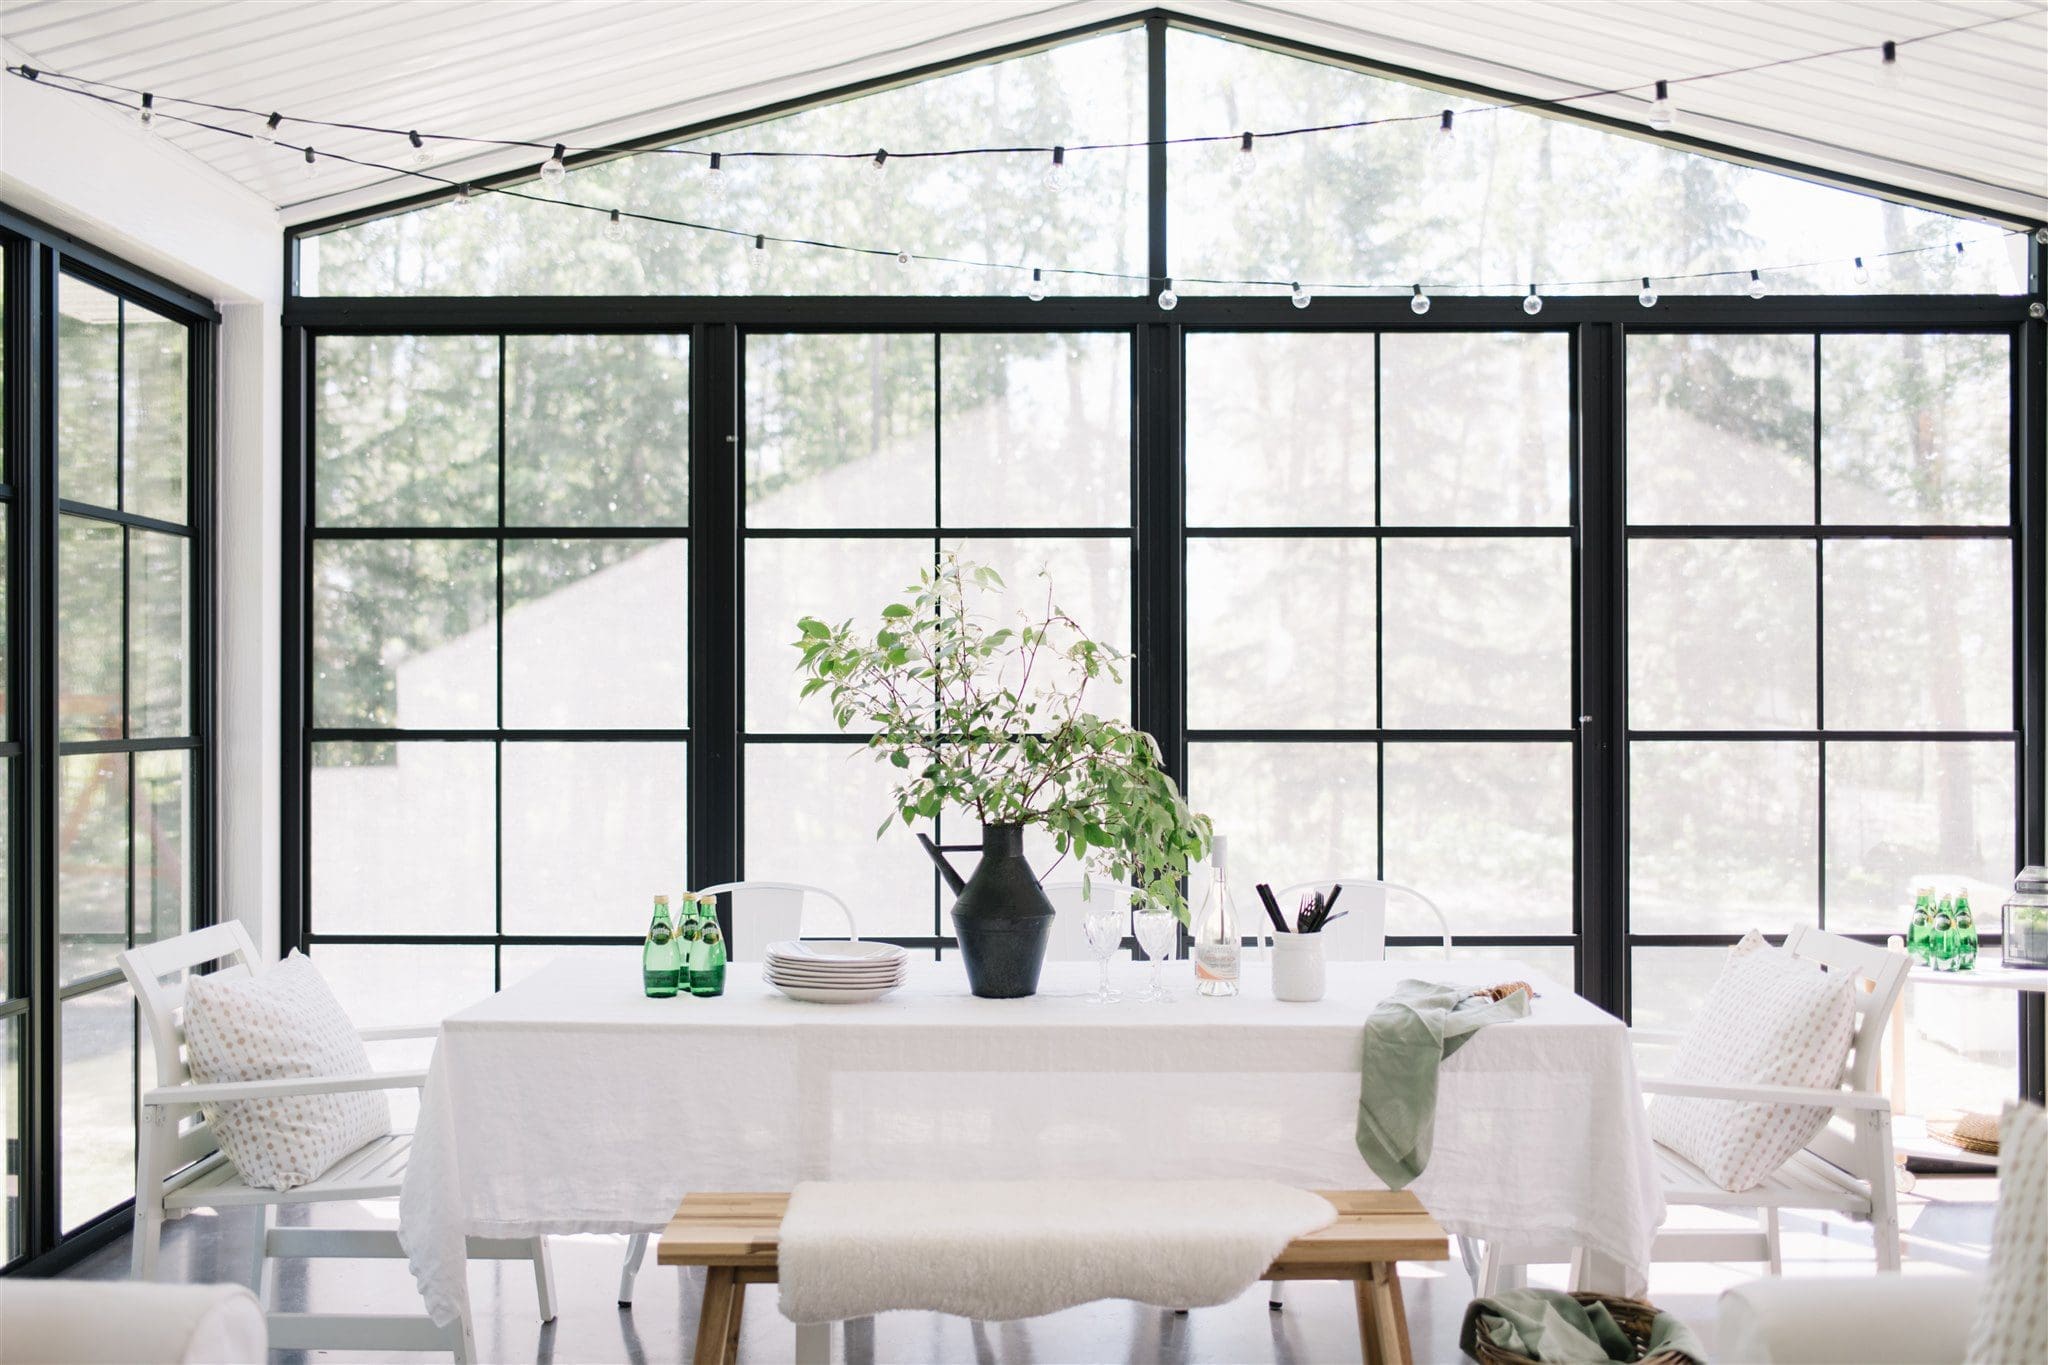
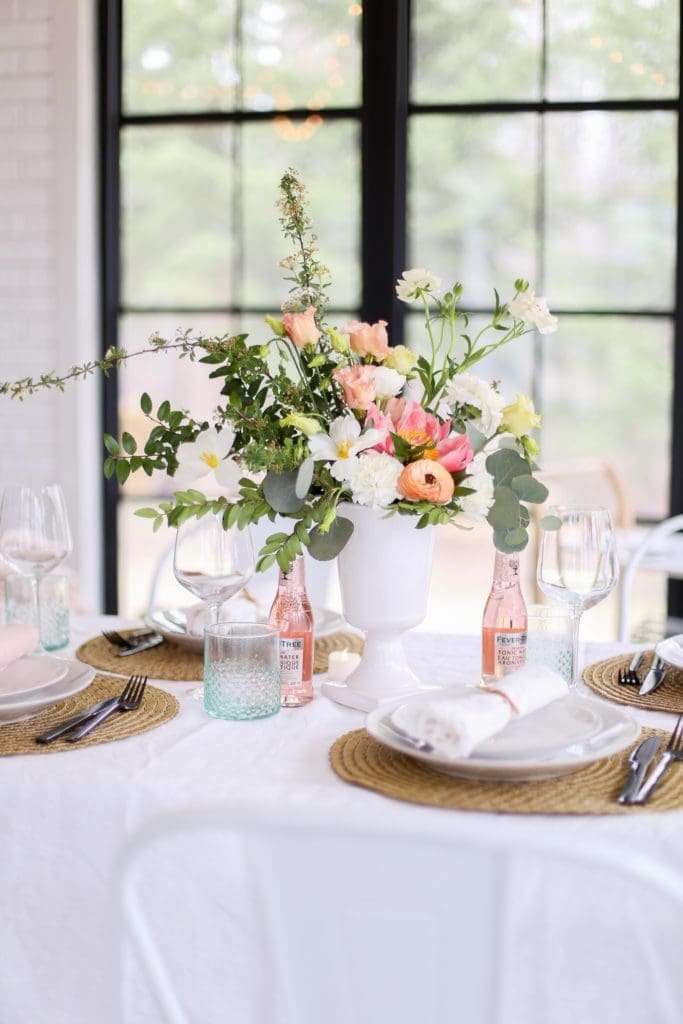
We were thinking we would do maybe 12ft x 8ft…enough for a small seating area. Then we thought about all the different ways that we could use the space if we made it larger (and how much we hate mosquitos). So we decided to up the dimensions to 16ft x 20ft! It’s a big enough space for both a seating area and a dining area. I love the flexibility that the larger size has allowed us. We’ve had it set up in so many ways, from birthday party headquarters to greenhouse stand-in, to dinner party digs. It’s truly a multifunctional space.

Windows
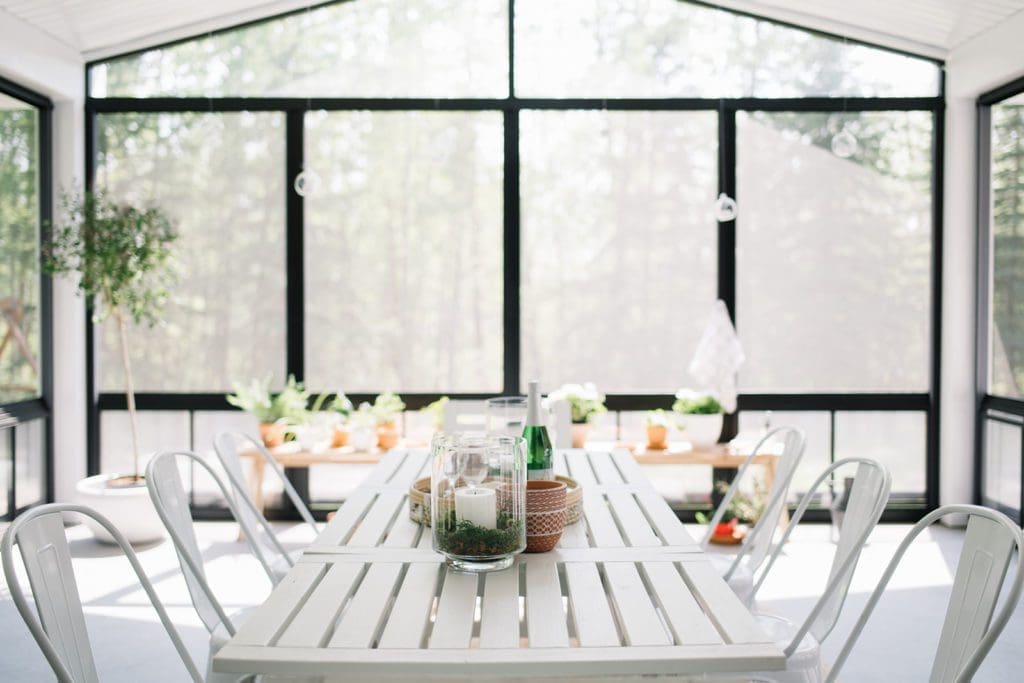
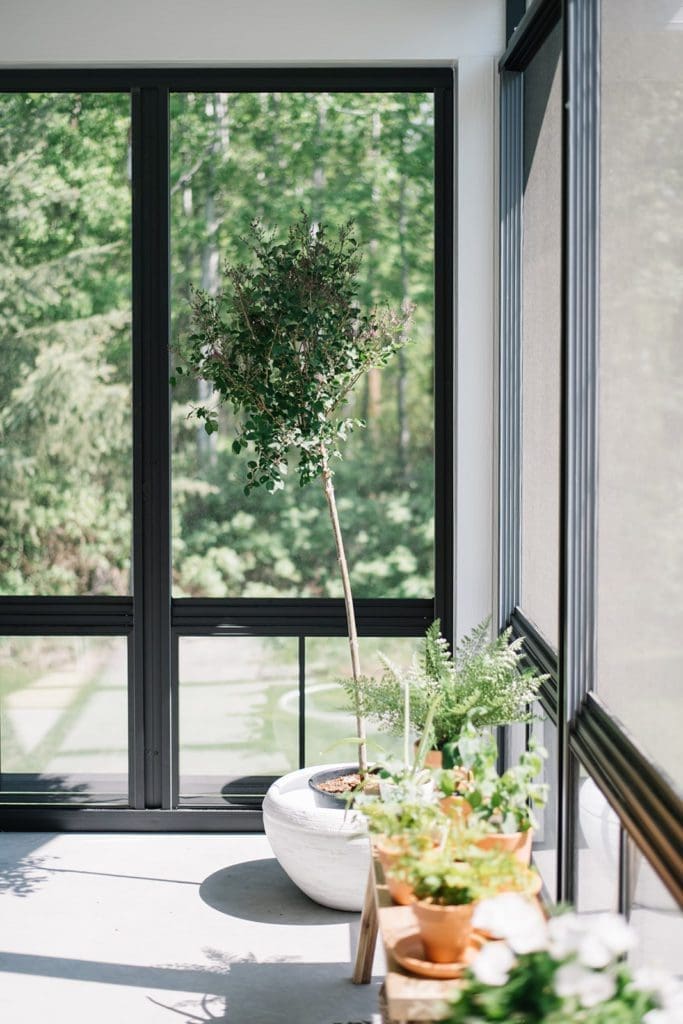
When I searched for screening options for the sunroom, I fell in love with our black screen windows from Suncoast Enclosures! They are screen panels that come with an option to add sliding vinyl windows. They can be fully opened or closed to retain heat and protect the space from inclement weather. The windowpanes are made of a super thick strong vinyl, not glass!
In the photo below the windows are pushed down to the bottom to let fresh air in while keeping creepy crawlies out!
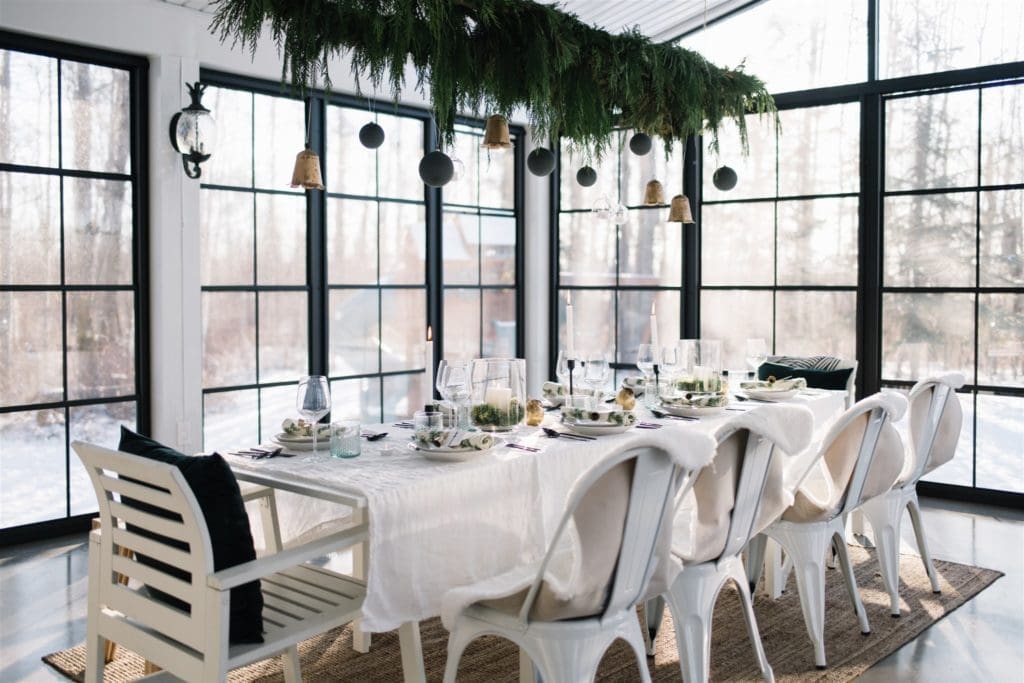
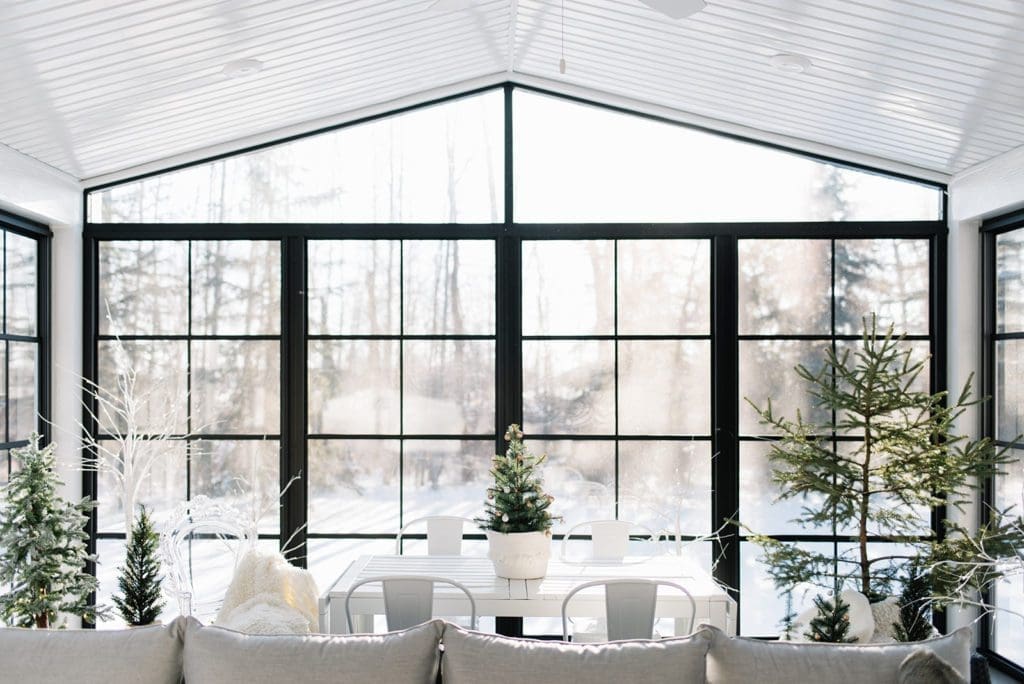
Then in this photo, which was taken at Christmas time, the windows are up to retain the heat.
Sunroom Interior Finishes
I kept the finishes simple in the interior of the sunroom and we used as many outdoor materials as we could. Even though the room is enclosed in the winter, it’s still an outdoor area and it gets damp, cold etc…
Ceiling
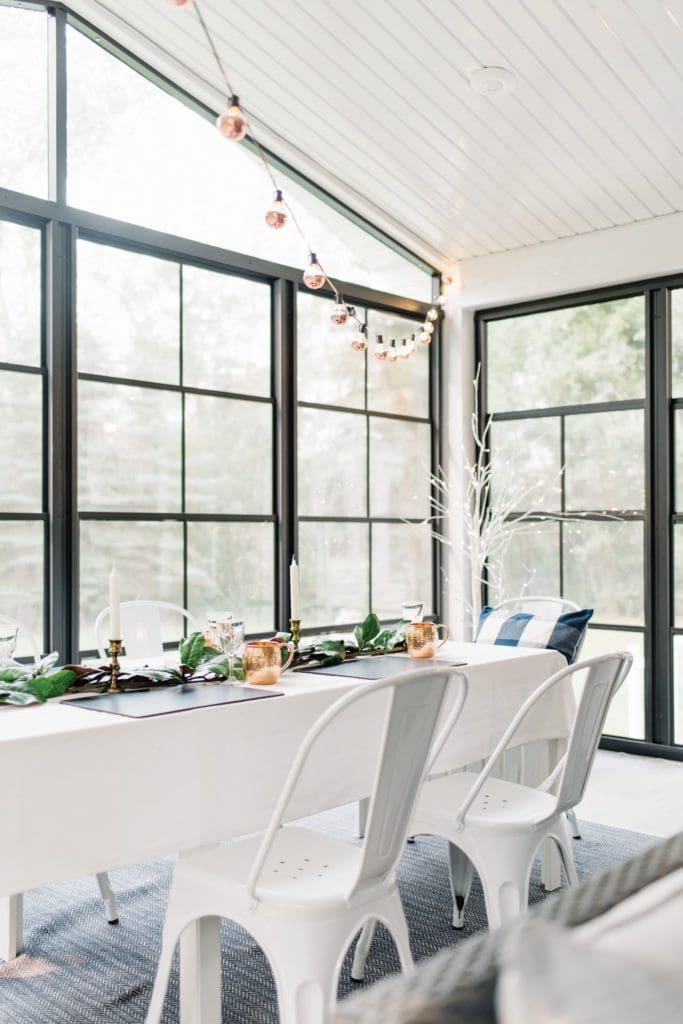
We covered the vaulted ceiling in plain white aluminum soffit panels (unvented). Pot lights in the ceiling make sure the space can be brightly lit if needed. This created a planked ceiling look that’s completely maintenance-free.
Flooring
We poured a concrete slab floor (4″ thick) and then sealed it. I like the simplicity and durability of concrete. As I mentioned before I love that no bugs can get in, but it’s definitely cold on the feet!
Walls
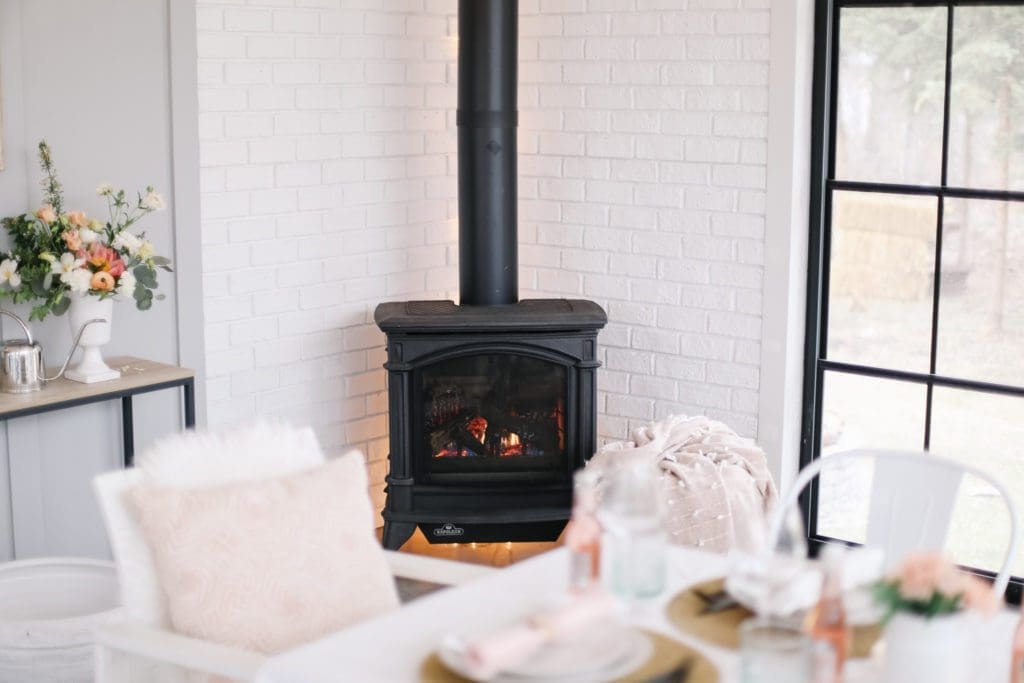
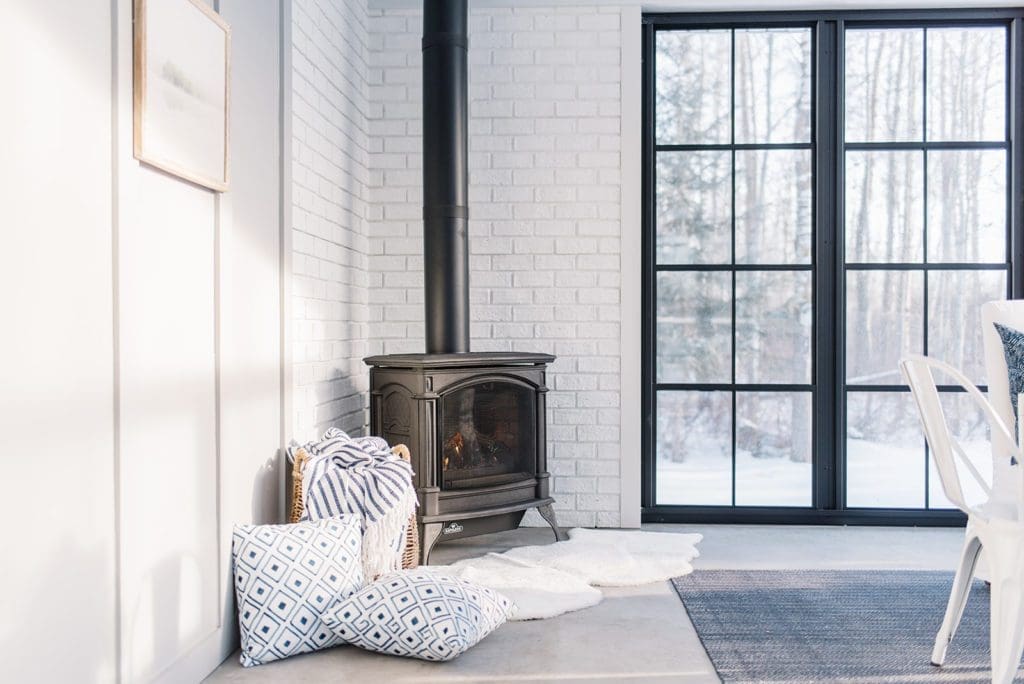
The interior wall is covered in the same cement board as the exterior. Behind the fireplace, we added some faux white brick. I love the contrast of all the materials together!
Fireplace
We chose to add a natural gas stove to the room so that we could heat it and extend the amount of time that we can use the space each year. I am so happy we chose to do this even though it was a big expense. Today, as I sit and write this post, it’s about 10ºC and raining and the fire is blazing away keeping me warm. It’s so cozy out here listening to the rain and the birds, but staying toasty at the same time!
Things to Think About Before You Build a Sunroom Addition
Overall we are so pleased with how our sunroom addition turned out. We get so much use out of the space. If you are thinking about building a sunroom, here are some of the things I would recommend you think about:
What I love about our Sunroom Addition
- It’s large enough to be multifunctional.
- The 3 season windows. It wouldn’t be half as functional without them in our climate.
- A fireplace allows us to use the space for a much longer period each year!
- The black windows. There was a white option as well, but I’m so glad we went with the black. It adds a little bit of contrast and a more modern feel.
- I love that it’s a permanent structure. It won’t collapse under snow load or get wet and dirty over the winter.
- It was cheaper than adding a real extension and doesn’t count as indoor space for tax purposes etc…
What I would change about our Sunroom Addition
If I was building another sunroom space I would:
- Heat the floors! The concrete is soo cold, especially in the colder months
- Make sure I had space for some sort of storage cabinet. A little bit more wall space would have been nice.
- Change the fireplace positioning so that furniture could be oriented facing out towards the garden more.
- Add more electrical outlets!
- Have it overlooking the ocean or a lake…ok ok now I’m just dreaming lol!
How Much Does it Cost to Build a Sunroom Addition?
I get asked this question a fair bit and it’s so hard to answer. For one thing, the cost of materials and labour varies wildly depending on location. Here in Canada costs are extremely high. If you are building in the southern US for example, your costs would be exponentially lower.
Your best bet is to either add up all the materials you need and then factor in labour etc… yourself or to get a few estimates from contractors in your area. Figure out your exact cost based on the scope of your project and location. There really is no way to cut corners when it comes to figuring it out. It’s best for you to be highly informed before you start a major project like this anyway!
Here is where we sourced our materials. If you have questions about something that isn’t listed here, just leave a comment at the end of the post.
Sunroom Sources List
- Board & Batten Siding: Allura Fiber Cement Siding in Sterling Grey from Everything Exterior
- Trim: Allura Fiber Cement trim in Snow White from Everything Exterior
- White Faux Brick: Hourwall vintage white brick from Everything Exterior
- Screens & Vinyl Windows: Suncoast Enclosures
- Interior Door: All-Weather fiberglass door with 3/4 glass insert
- Fireplace: Napolean Knightsbridge gas stove
- Lighting: Pineapple outdoor sconces
- Ceiling Fan: White hanging outdoor fan
- Dining Table: Ikea ÄPPLARÖ Drop-leaf outdoor table
- Dining Chairs: White Metal Chairs
I hope you find this rundown on our sunroom addition useful. We really do love it. I would definitely recommend it if you live somewhere with a lot of mosquitos! I don’t think I would build a house again without a mudroom or a sunroom now!
To see the sunroom all dressed up for the seasons check out the posts below!

Can you access it from the interior of your house? Or do you need to go outside to access it?
Both 🙂 We can access it from our mudroom and also from our back deck.