")


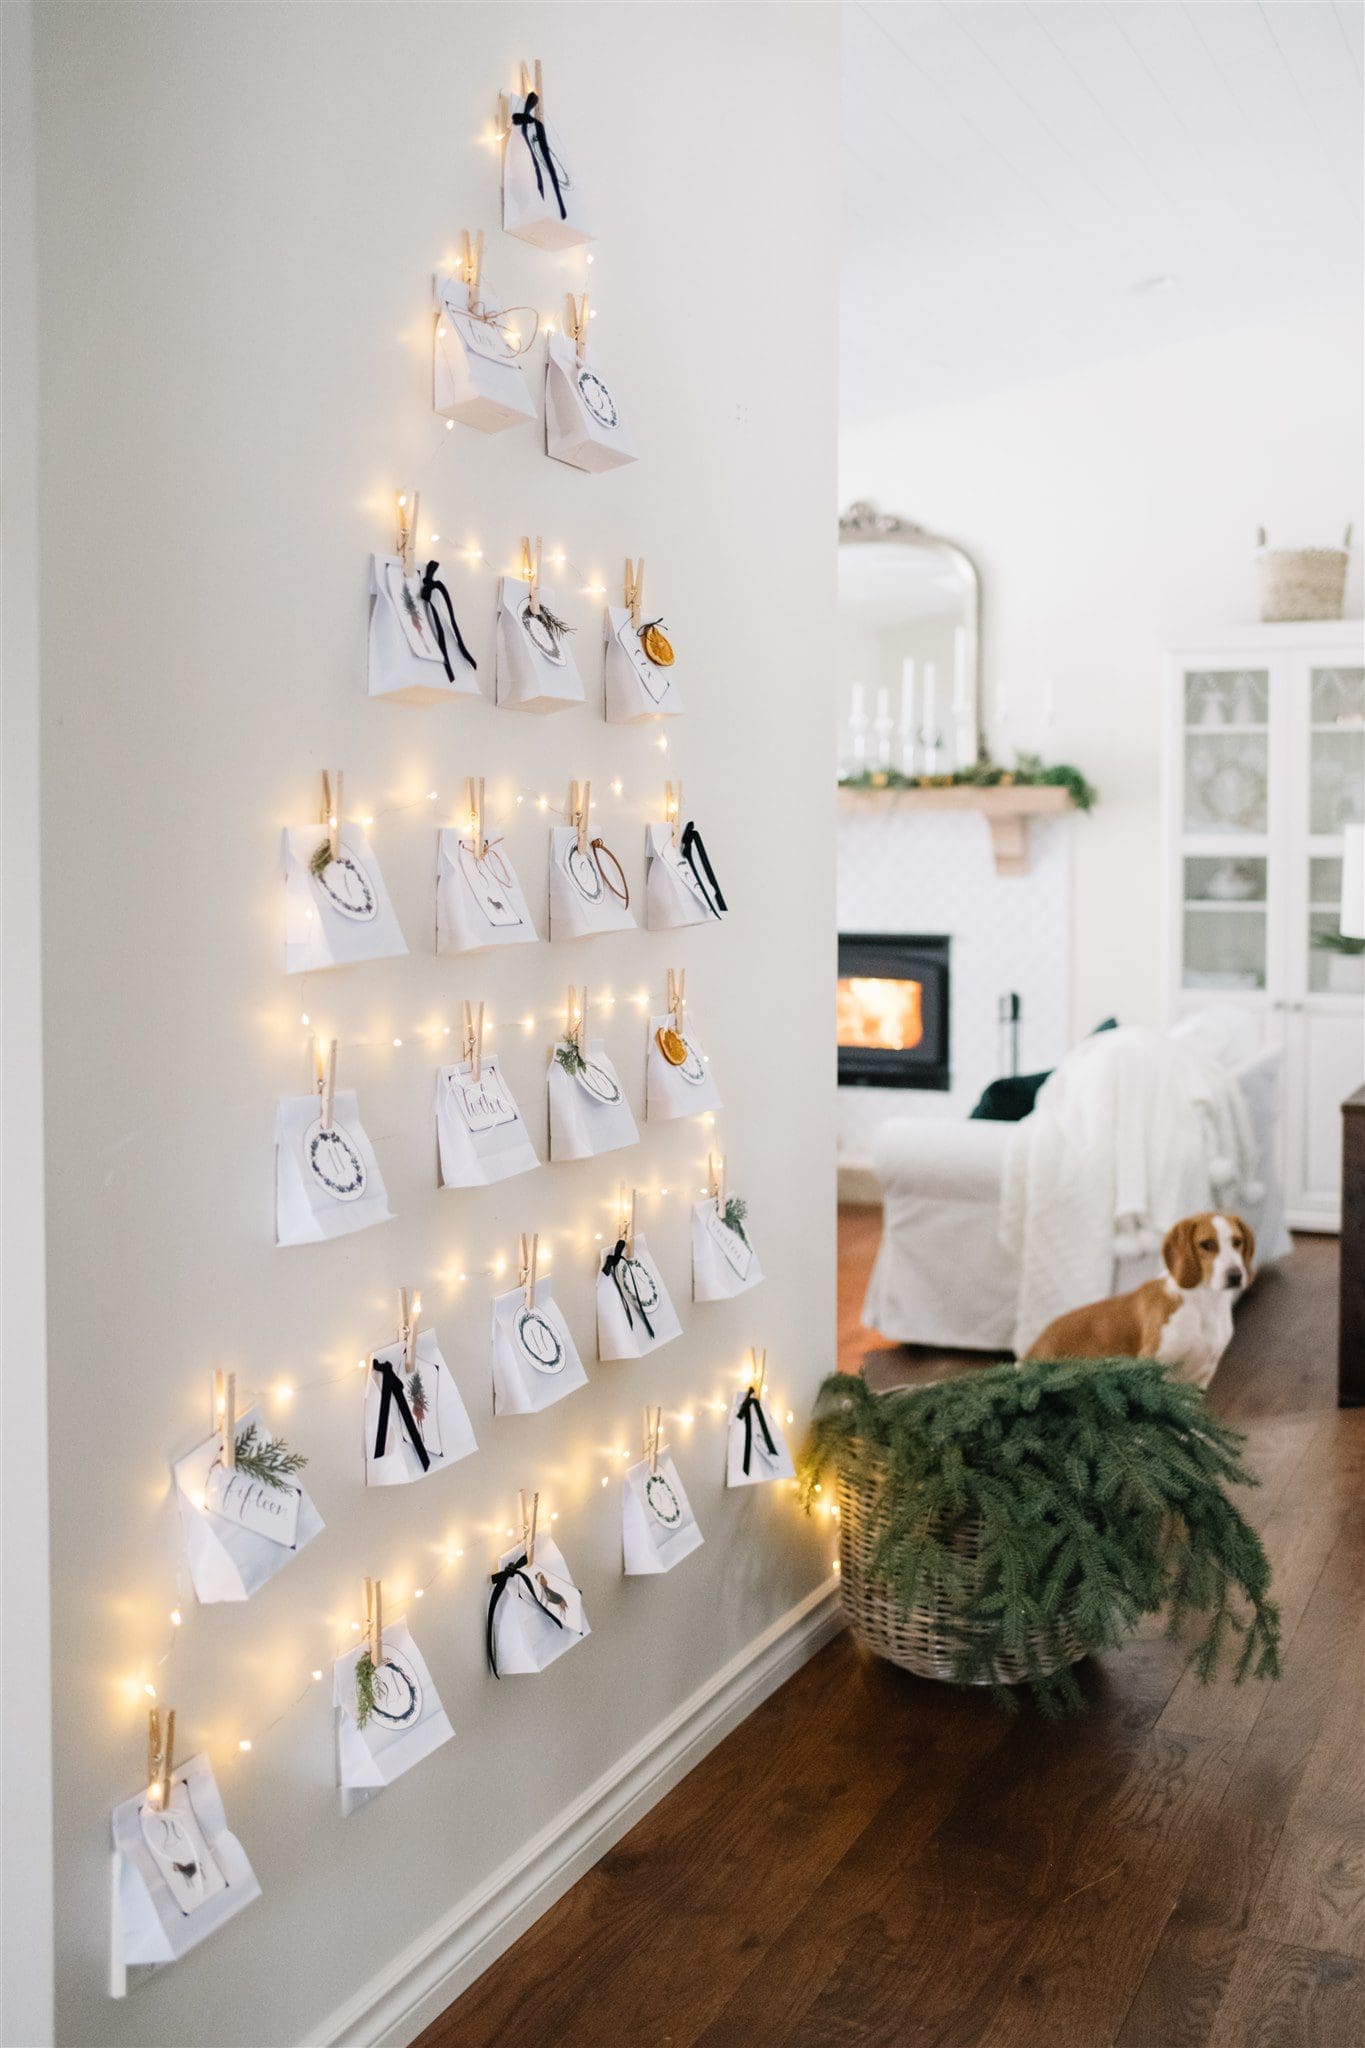
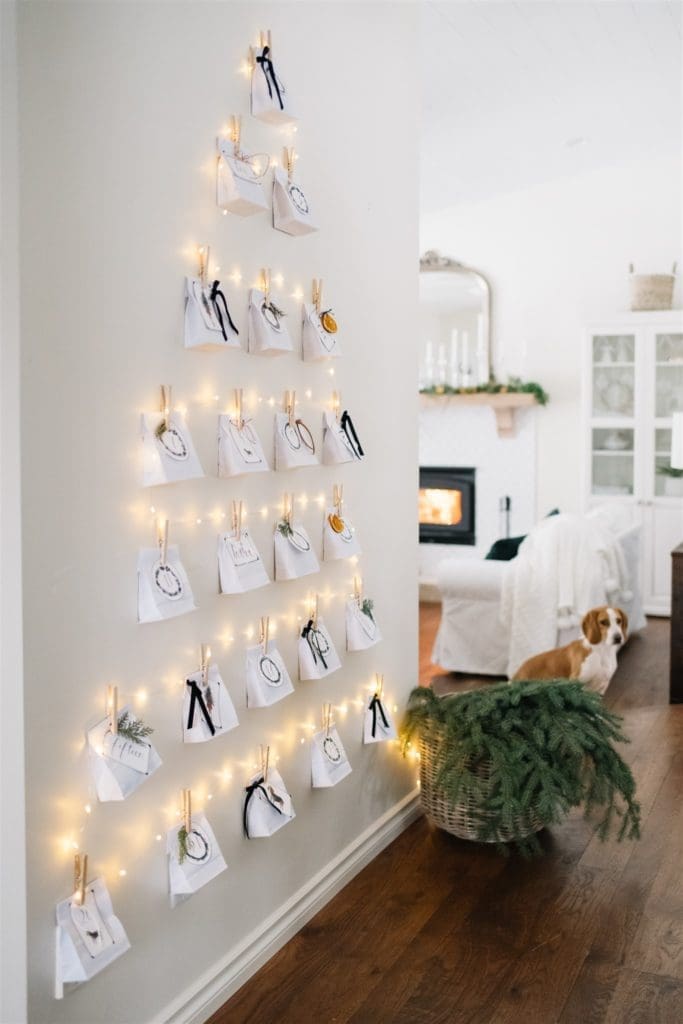
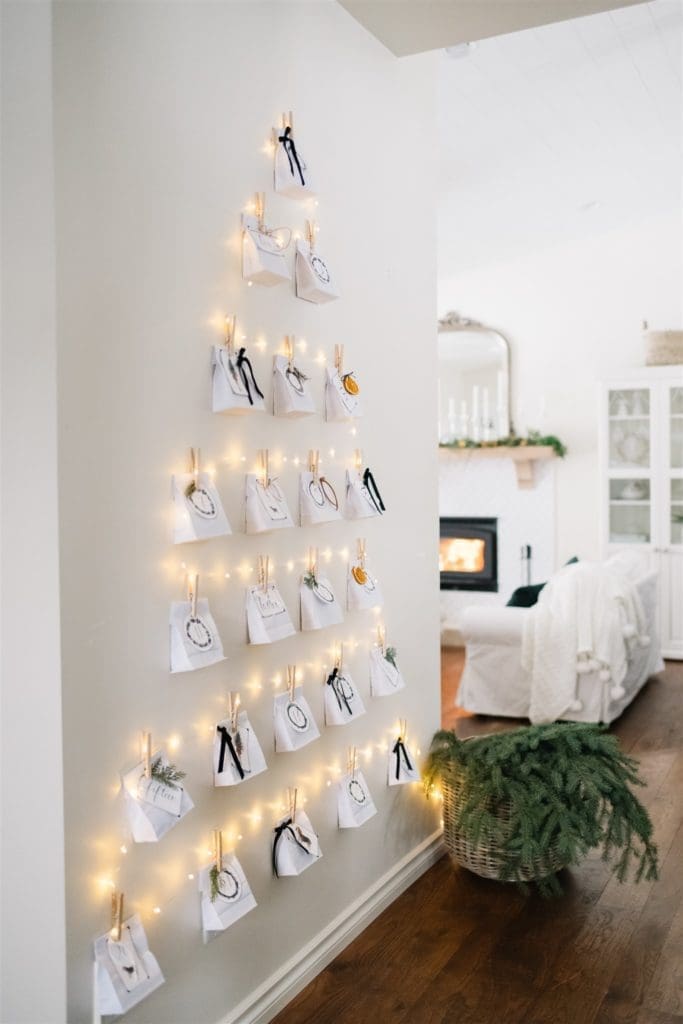
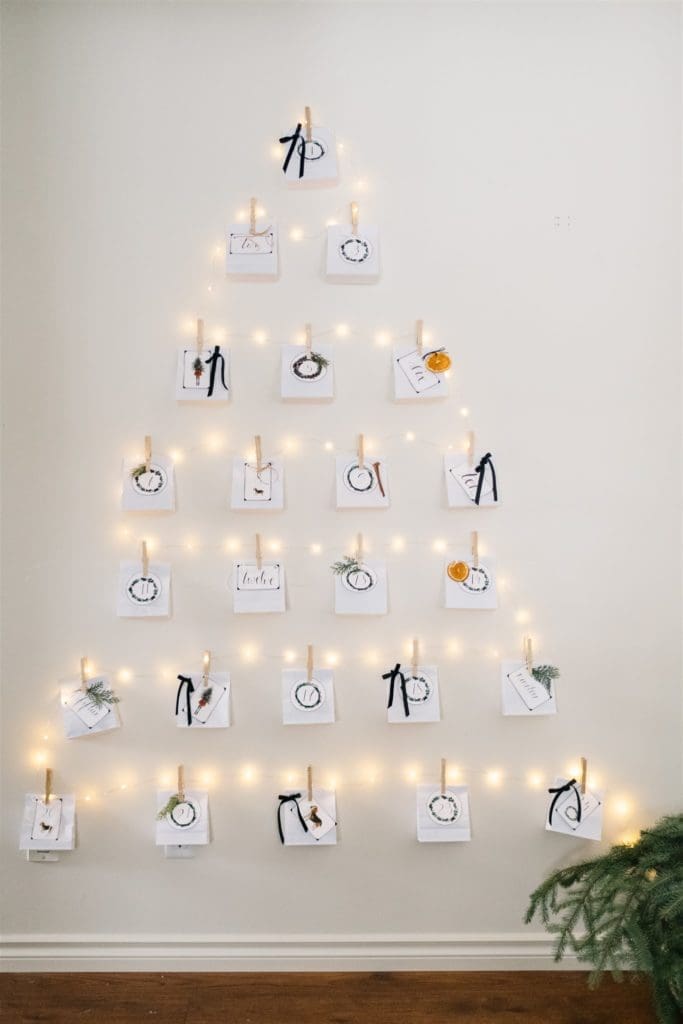
Each year we buy the girls Christmas Advent calendars. They are usually the inexpensive ones you can buy for a few dollars with chocolates inside. We splurged on Playmobil calendars last year. The girls loved those! I wanted to do something a little special this year! I made this DIY Christmas Advent calendar made from simple white paper gift bags, printable tags and some pretty ribbon and garnishes!
Estimated reading time: 7 minutes
Note: This post may contain affiliate links that won’t change your price but may share some commission.
Table of Contents
Create a Christmas Tree Template
The advent calendar is made of white paper bags stuck to the wall in the shape of a Christmas tree! It’s super simple. The bags are just attached to the wall by sticking command strips to the back of wooden clothes pegs. If you cut a large command strip in half it fits perfectly on the back of a peg! This method is so easy and won’t leave any holes!
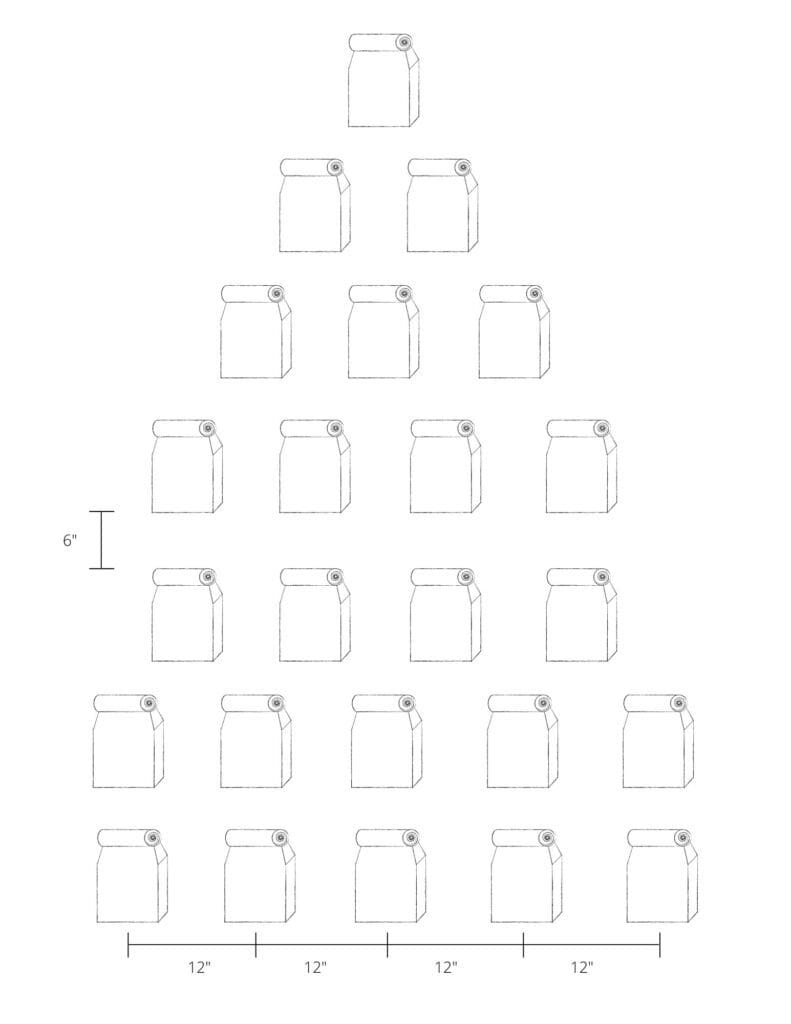
You can make your tree whatever size best fits your wall space, but I made my tree quite large. I did 2 rows of 5 bags on the bottom, then 2 rows of 4 bags, 1 row of 3 bags, 1 row of 2 bags, and then a single bag on the top to make my tree. I spaced the bags 12″ apart horizontally and left a 6-inch gap between rows!
Fill Bags with Treats
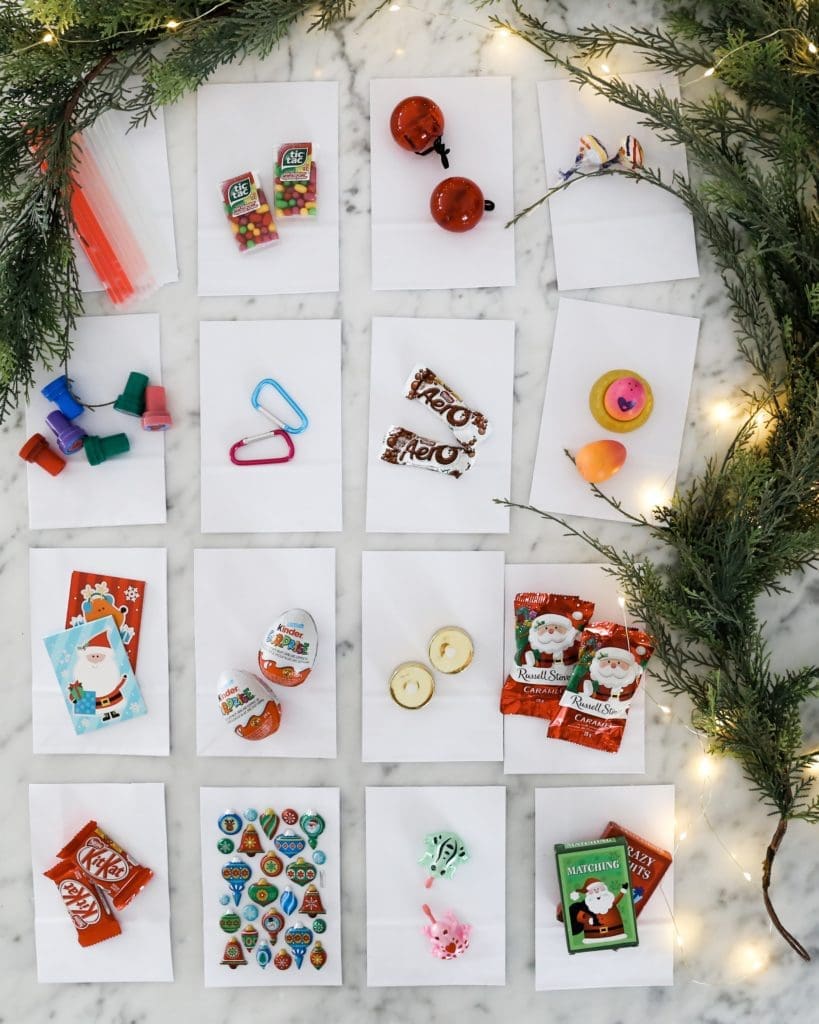
Before clipping the bags to the wall I filled them with small treats or toys!
Some ideas for fillers:
- Halloween candy – This is my favourite option! It’s free and it stops your kids from eating it all immediately after Halloween!
- Dollar store toys – Definitely cost effective! This is the option I went with this year! I found stickers, treats, stamps, toys, glowsticks, pens, notebooks and more!
- Indigo novelty gifts – If you are willing to spend a little more on each small gift Chapters Indigo is one of my favourite stores to find novelty stocking stuffers and small gift items!
- Buy a Lego or Playmobile set and put a few new pieces in each day so that the set is built over time!
Add Sweet Notes
I also thought it would be sweet to write notes of affirmation to add in with the toys and treats! I like to put these the girls’ lunches too! You could also write out a winter or holiday bucket list item or fun activity to do together! The options are endless!

Even though I made this calendar for my kids, I was thinking about how nice it would be to make one for myself! Even Ollie would love one…

Personalize Your Calendar
FOR HIM
Write coupons for a back massage, guys night out, skip the dishes pass, or a new adventure activity to try!
ECO-FRIENDLY
If you are an eco-conscious household look for environmentally friendly stuffers like handmade candies, wooden toys, etc.. Maybe add in a pass to the local science center or the zoo to learn about the world around us!
FOR HER
Pampering supplies like bath salts, sleep masks, gift certificates to the spa, or a nice dinner out would make the busy holiday season feel a little less hectic!
ESSENTIAL OILS
You can make so many yummy and non-toxic products with essential oils. You can also buy ready-made supplies from Young Living like lip balm, hand sanitizer, rollers, diffuser blends, beauty products, oil-infused jewelry, etc…
FOR PETS
Make a mini version for the fluffiest member of your family! Squeaky toys, chews, treats, and accessories would make for a fun puppy calendar!
FOR COUPLES
Make it romantic! Sweet love notes or date ideas make excellent stuffers. Take the opportunity to make your significant other feel extra special!
PAY IT FORWARD
This might be my favourite idea! Put an act of service to perform each day into the Advent calendar bags and see how much good you can do this holiday season. Volunteer at a shelter, pay for someone’s coffee in line, or leave a kind note for a stranger! This one embraces the true spirit of Christmas and would be a great one to do with kids!
Decorate Your Gift Bags
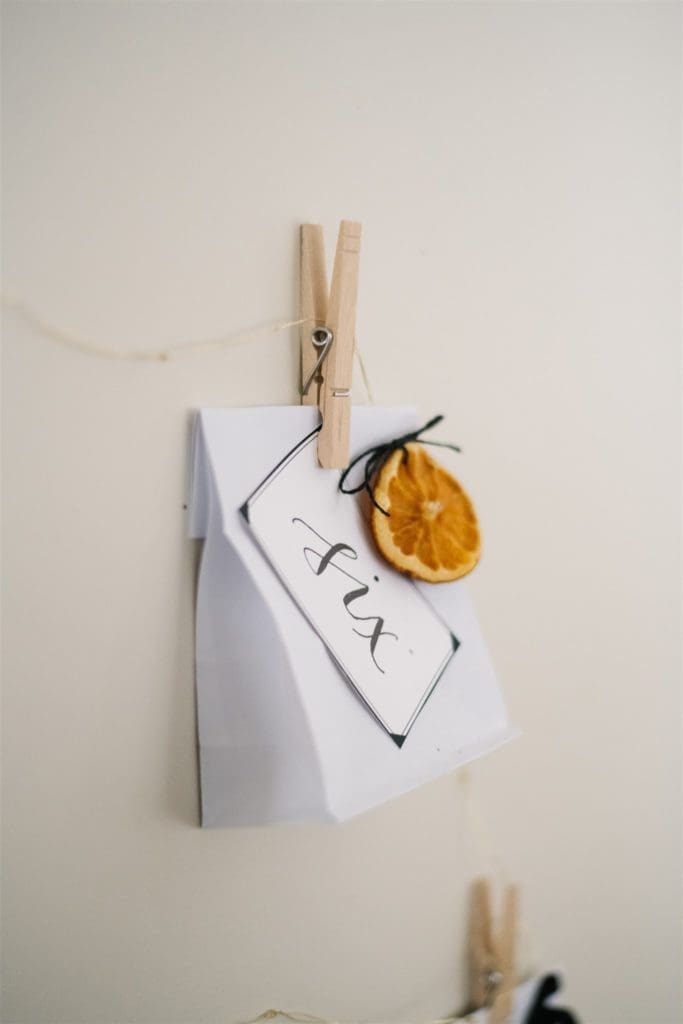
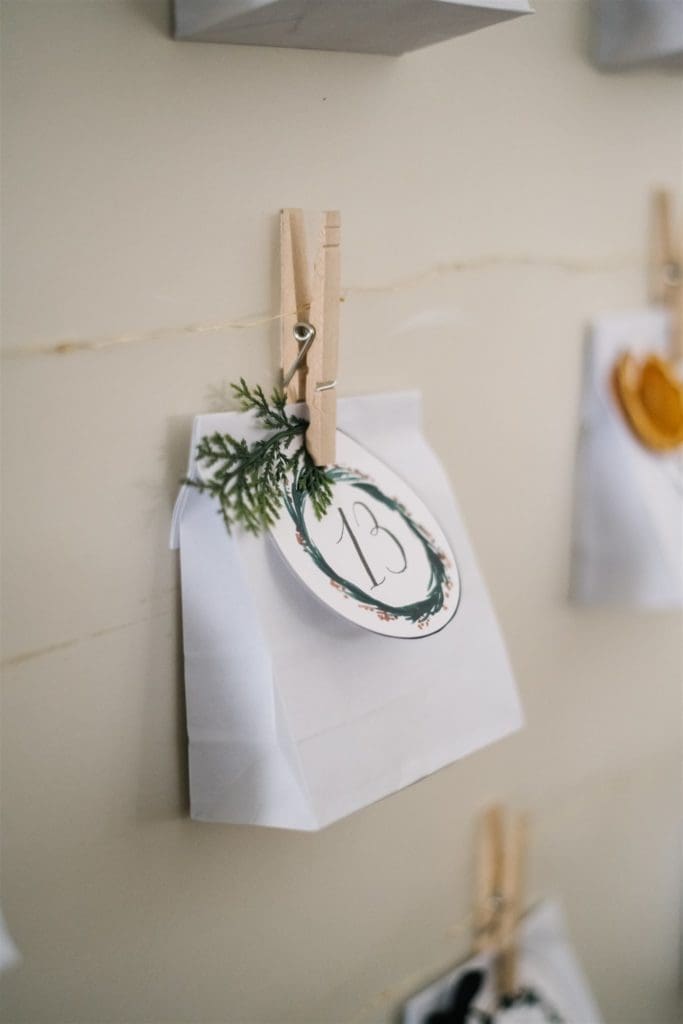
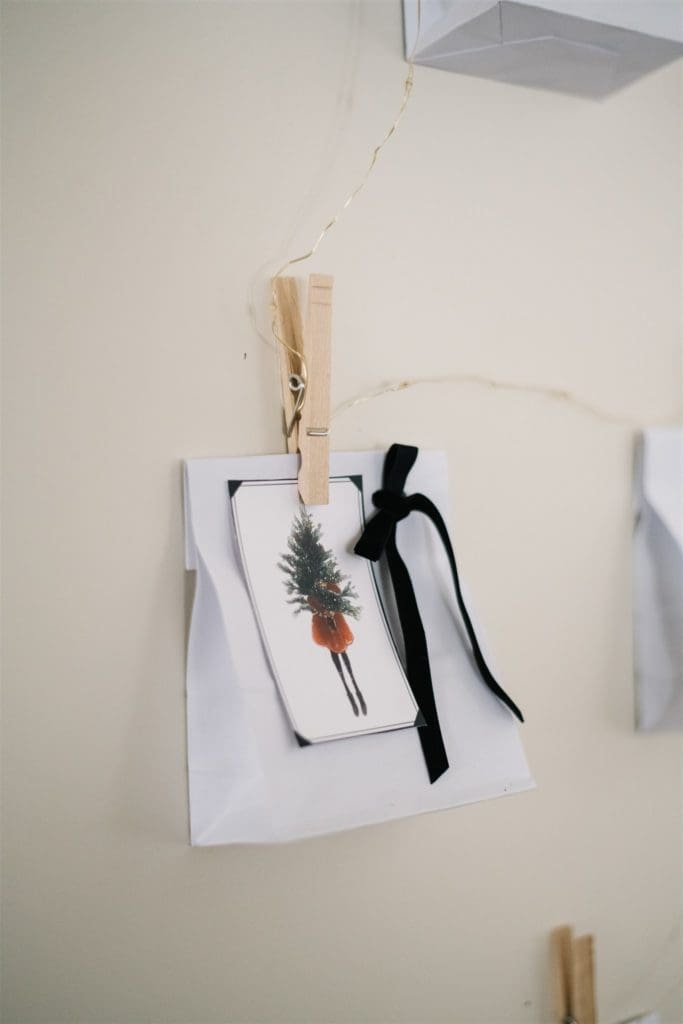
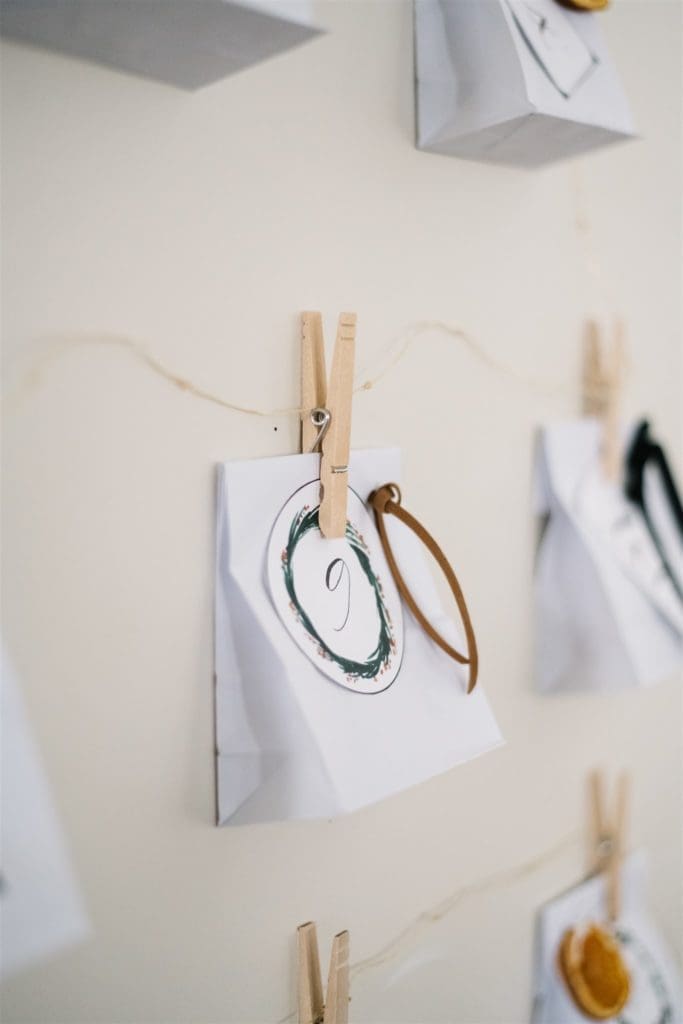
I used a variety of items liked dried oranges, snippets of greens, velvet ribbon, leather ties and string to dress up each bag.
How to keep the bags closed
An easy way to dress up the bags is to fold the top over and then use a hole punch to place 2 holes next to each other close to the top. Then thread the ribbon through the holes from the back and tie in the front! It looks pretty and keeps the bag closed as well as securing the tag!
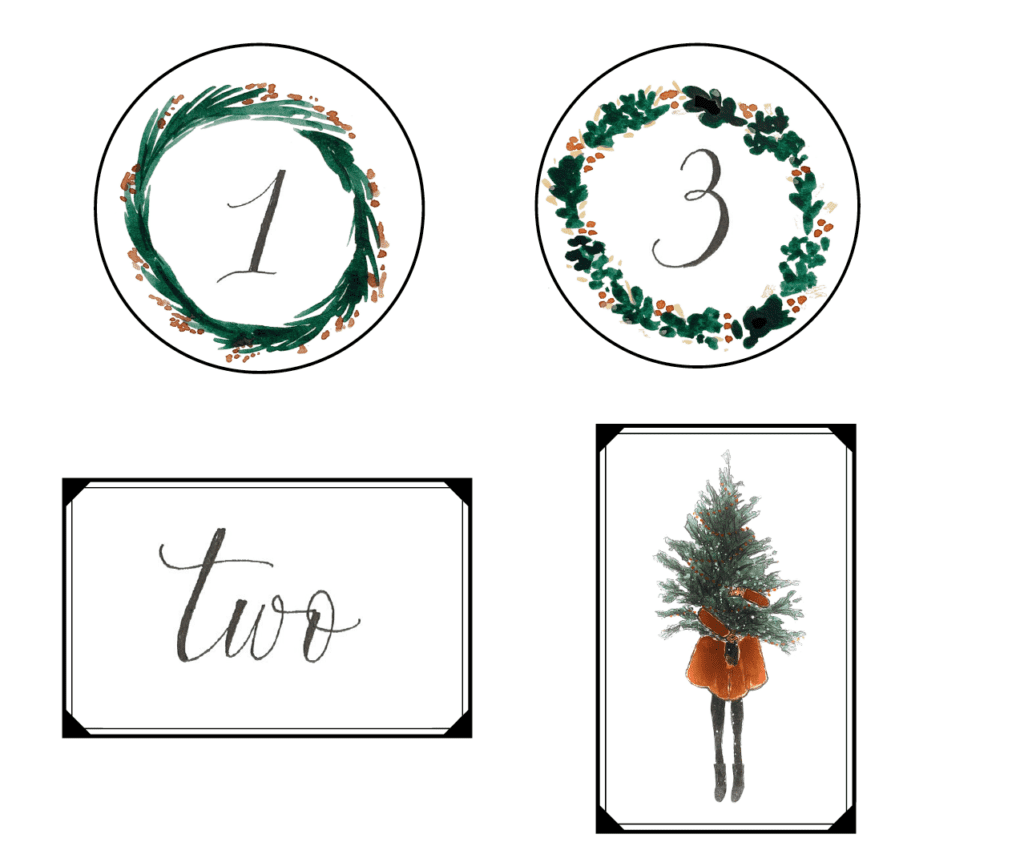
Add Numbered Tags
Alexandra from The Blessed Willow Gallery created these one-of-a-kind advent calendar tags and we are giving them to you for free! Just scroll to the end of the post to print out your own set. I like to print them out on cardstock!
FREE PRINTABLE DIY CHRISTMAS ADVENT CALENDAR TAGS
Add Christmas Tree Lights
Fairy string lights outline the shape of the Christmas tree and add holiday sparkle and shine! I placed the end of the lights at the peak of the tree and then worked my way down to string them so that I could hide the battery pack behind a basket of green on the floor! They are just lightly would around the clothespegs to keep them in place!
PRINTABLE CHRISTMAS TREE ADVENT CALENDAR INSTRUCTIONS
I hope this easy to make DIY Christmas Advent calendar makes your holiday season just a little more special!
MORE GOOD READS:

This is such a lovely Advent calendar! Thank you so much for sharing the steps and the free printables : )
You’re welcome! And thanks for taking the time to comment! It’s nice to know these DIY posts are useful!
How long is your set of lights?
I want to say 16ft? But there’s some extra length so you could probably get away with a shorter one!
Love the service idea mixed in with fun treats!
Thank you!!
Welcome and yes so important to give back!!
Any ideas for fur- babies. I want to add grand fur- babies this year.
How do you attach the lights and bags to the wall?
I used command hook stickies and clothes pegs! It’s explained at the beginning of the post if you want a visual!
Hi, where did you find the little white paper bags? Did you make them or purchase them? I can’t seem to find something similar! Thank you, the calendar is beautiful!
Hey I think I just found them on Amazon!
https://rstyle.me/+EPKdcToxguSsLBBfv0e-GA
You could also try Etsy or even the dollar store…
Thank you! I looked on Amazon but didn’t see these come up ????. Appreciate the response!
I’ve subscribed can you please send me the advent calendar tags 🙂
Hi Shannon, I’m showing that 5 emails have been sent but only 2 opened. Have you checked your junk mail in case a few ended up there? I will resend the Advent calendar email just in case!!
Hi! I just subscribed!
Hi thanks for the great idea. I will be making the tree this holidays season. I am trying to get the tags to put on the bags. It was saying subscribe and you would send them but I didn’t get them. Could you tell me how to get them?
You should have received an email with a link to the tags. Did you check your junk mail? Sometimes the emails get lost in there! I’ve resent it to you just in case.
hello
I too subscribed but alas, no tag link in email or spam folder… can you send please ??
Hi! I just subscribed and hope to be sent the advent calendar tags. Overall its so beautiful!